🛠️ Create document process model and email approval with AI Builder and Power Automate
📅 Published Date: March 13, 2025 ✍ Author: Pranay Reddy Muthyala
📌 Introduction
Invoice processing is a repetitive and time-consuming task in most organizations. Manual data extraction, verification, and approval workflows often result in delays, errors, and inefficiencies. In this Post, I’ll walk you through how to automate invoice processing and approval workflows using AI Builder and Power Automate.
🏢 Business Scenario
Imagine you work as a Power Platform consultant at a Organization. The Organization processes a large volume of vendor invoices manually. The current workflow involves:
- Receiving invoices in different formats (PDF, JPG, PNG).
- Employees printing invoices and manually recording details.
- Managers physically reviewing invoices and signing approvals.
This paper-based approach leads to:
❌ Processing delays due to dependency on manual work.
❌ Human errors when recording invoice amounts and vendor details.
❌ Lack of tracking and visibility into pending approvals.
🚀 The Solution: AI-Driven Invoice Processing & Approval
To improve efficiency, we’ll implement:
✅ AI Builder to extract structured invoice data automatically.
✅ Power Automate to trigger an approval workflow via email.
✅ Seamless approval tracking for finance teams.
🛠 Step-by-Step Implementation
1️⃣ Preparing the Environment
Before building the solution, we need:
✔ Microsoft Power Apps and Power Automate licenses.
✔ AI Builder (part of Power Platform) for model creation.
✔ Microsoft Dataverse to store structured invoice data.
🔧 Setup Steps
1️⃣ Sign in to Power Automate at make.powerautomate.com.
2️⃣ Enable AI Builder in your environment.
3️⃣ Download sample invoices (PDF, PNG, JPG formats) for training.
2️⃣ Creating an Invoice Processing Model in AI Builder
Now that we have set up the environment, the next step is to create an AI model in AI Builder to automatically extract invoice details such as Invoice Number, Vendor Name, Date, and Total Amount.
📌 Steps to Build the Invoice Processing Model
1️⃣ Sign in to AI Builder
- Navigate to Power Automate.
- In the left navigation pane, select AI Hub → AI Models.
-
If AI Hub is not visible, click More and select it from the expanded menu.
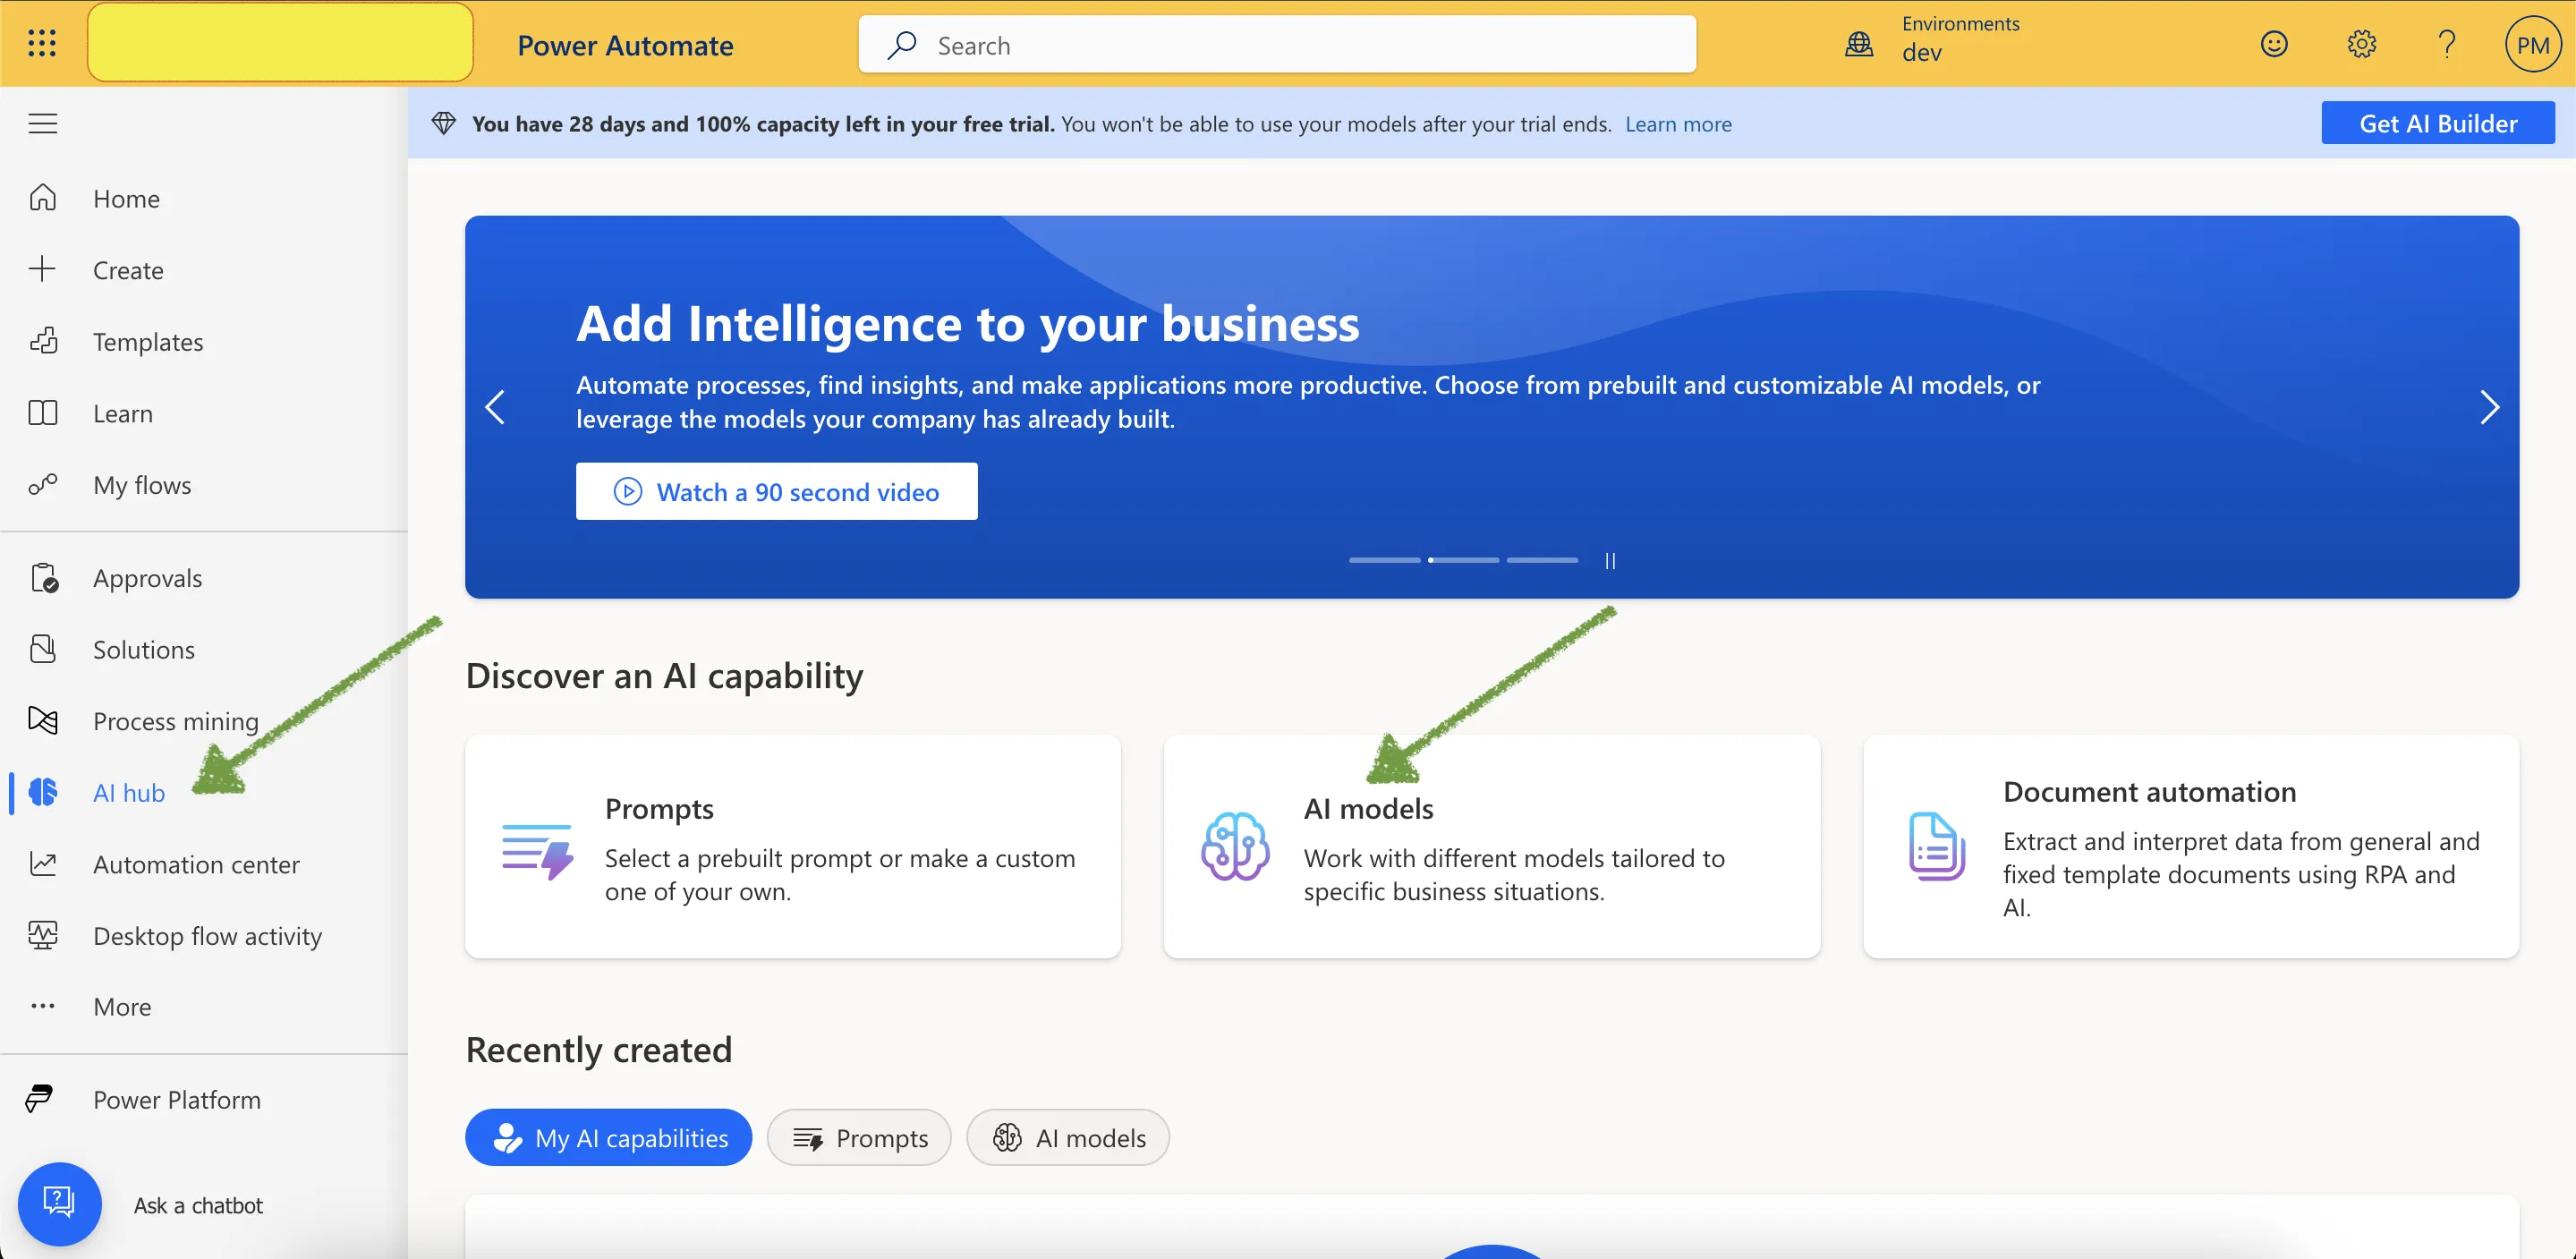
-
Click AI Models, then select Extract customer information from documents.
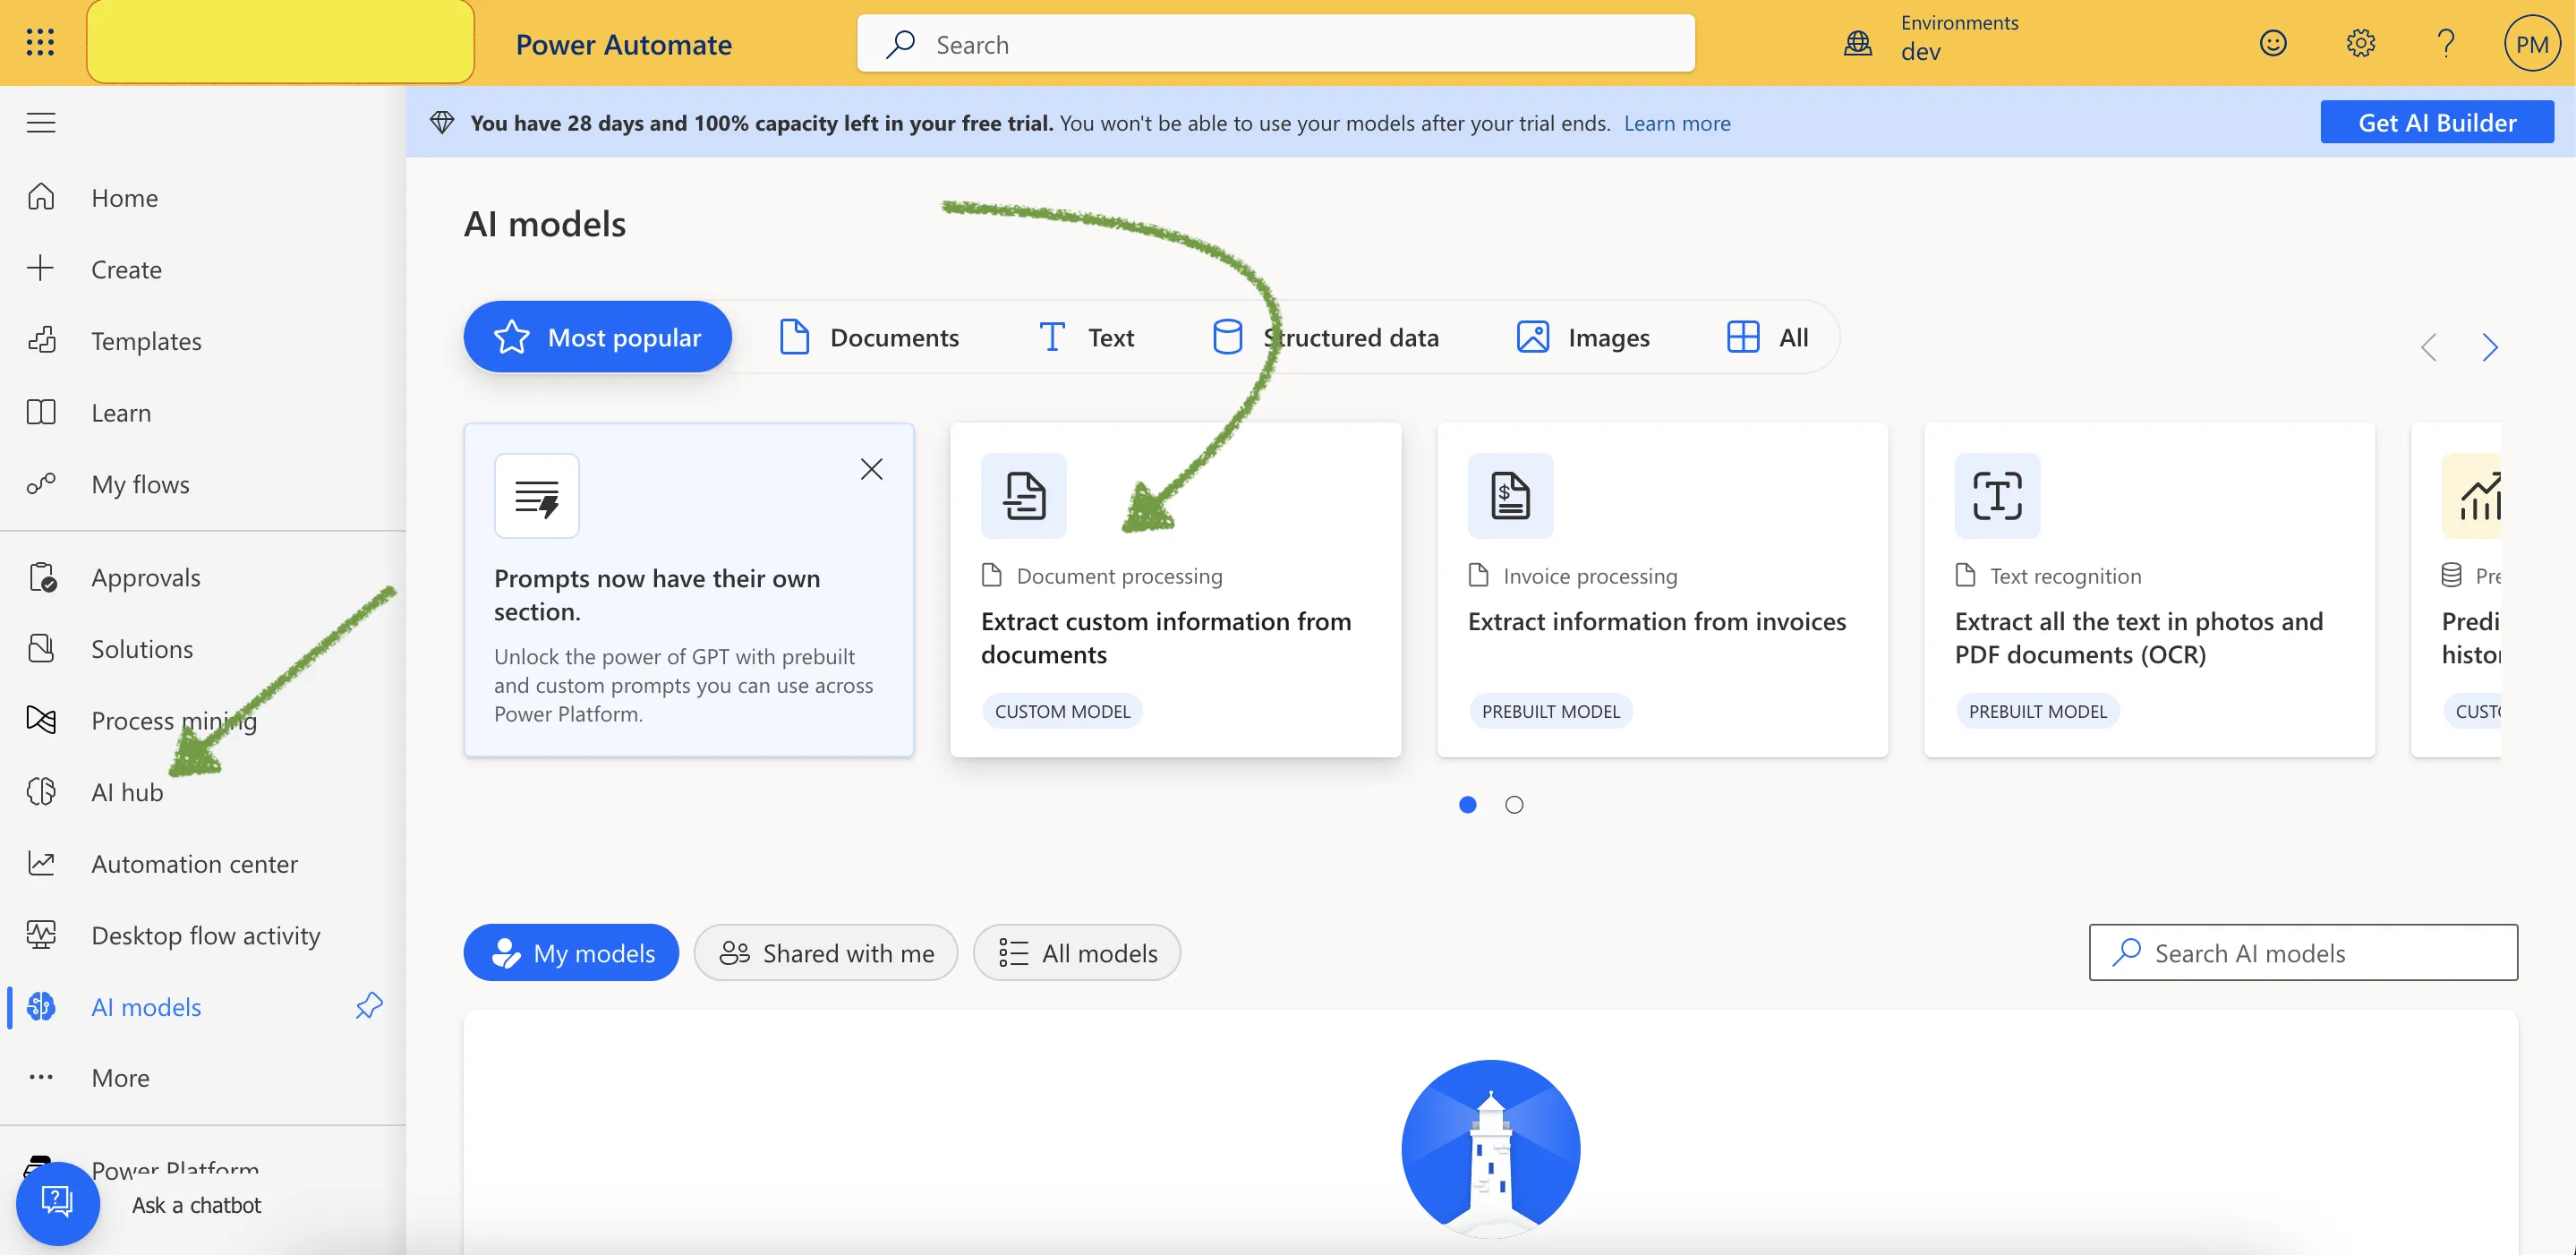
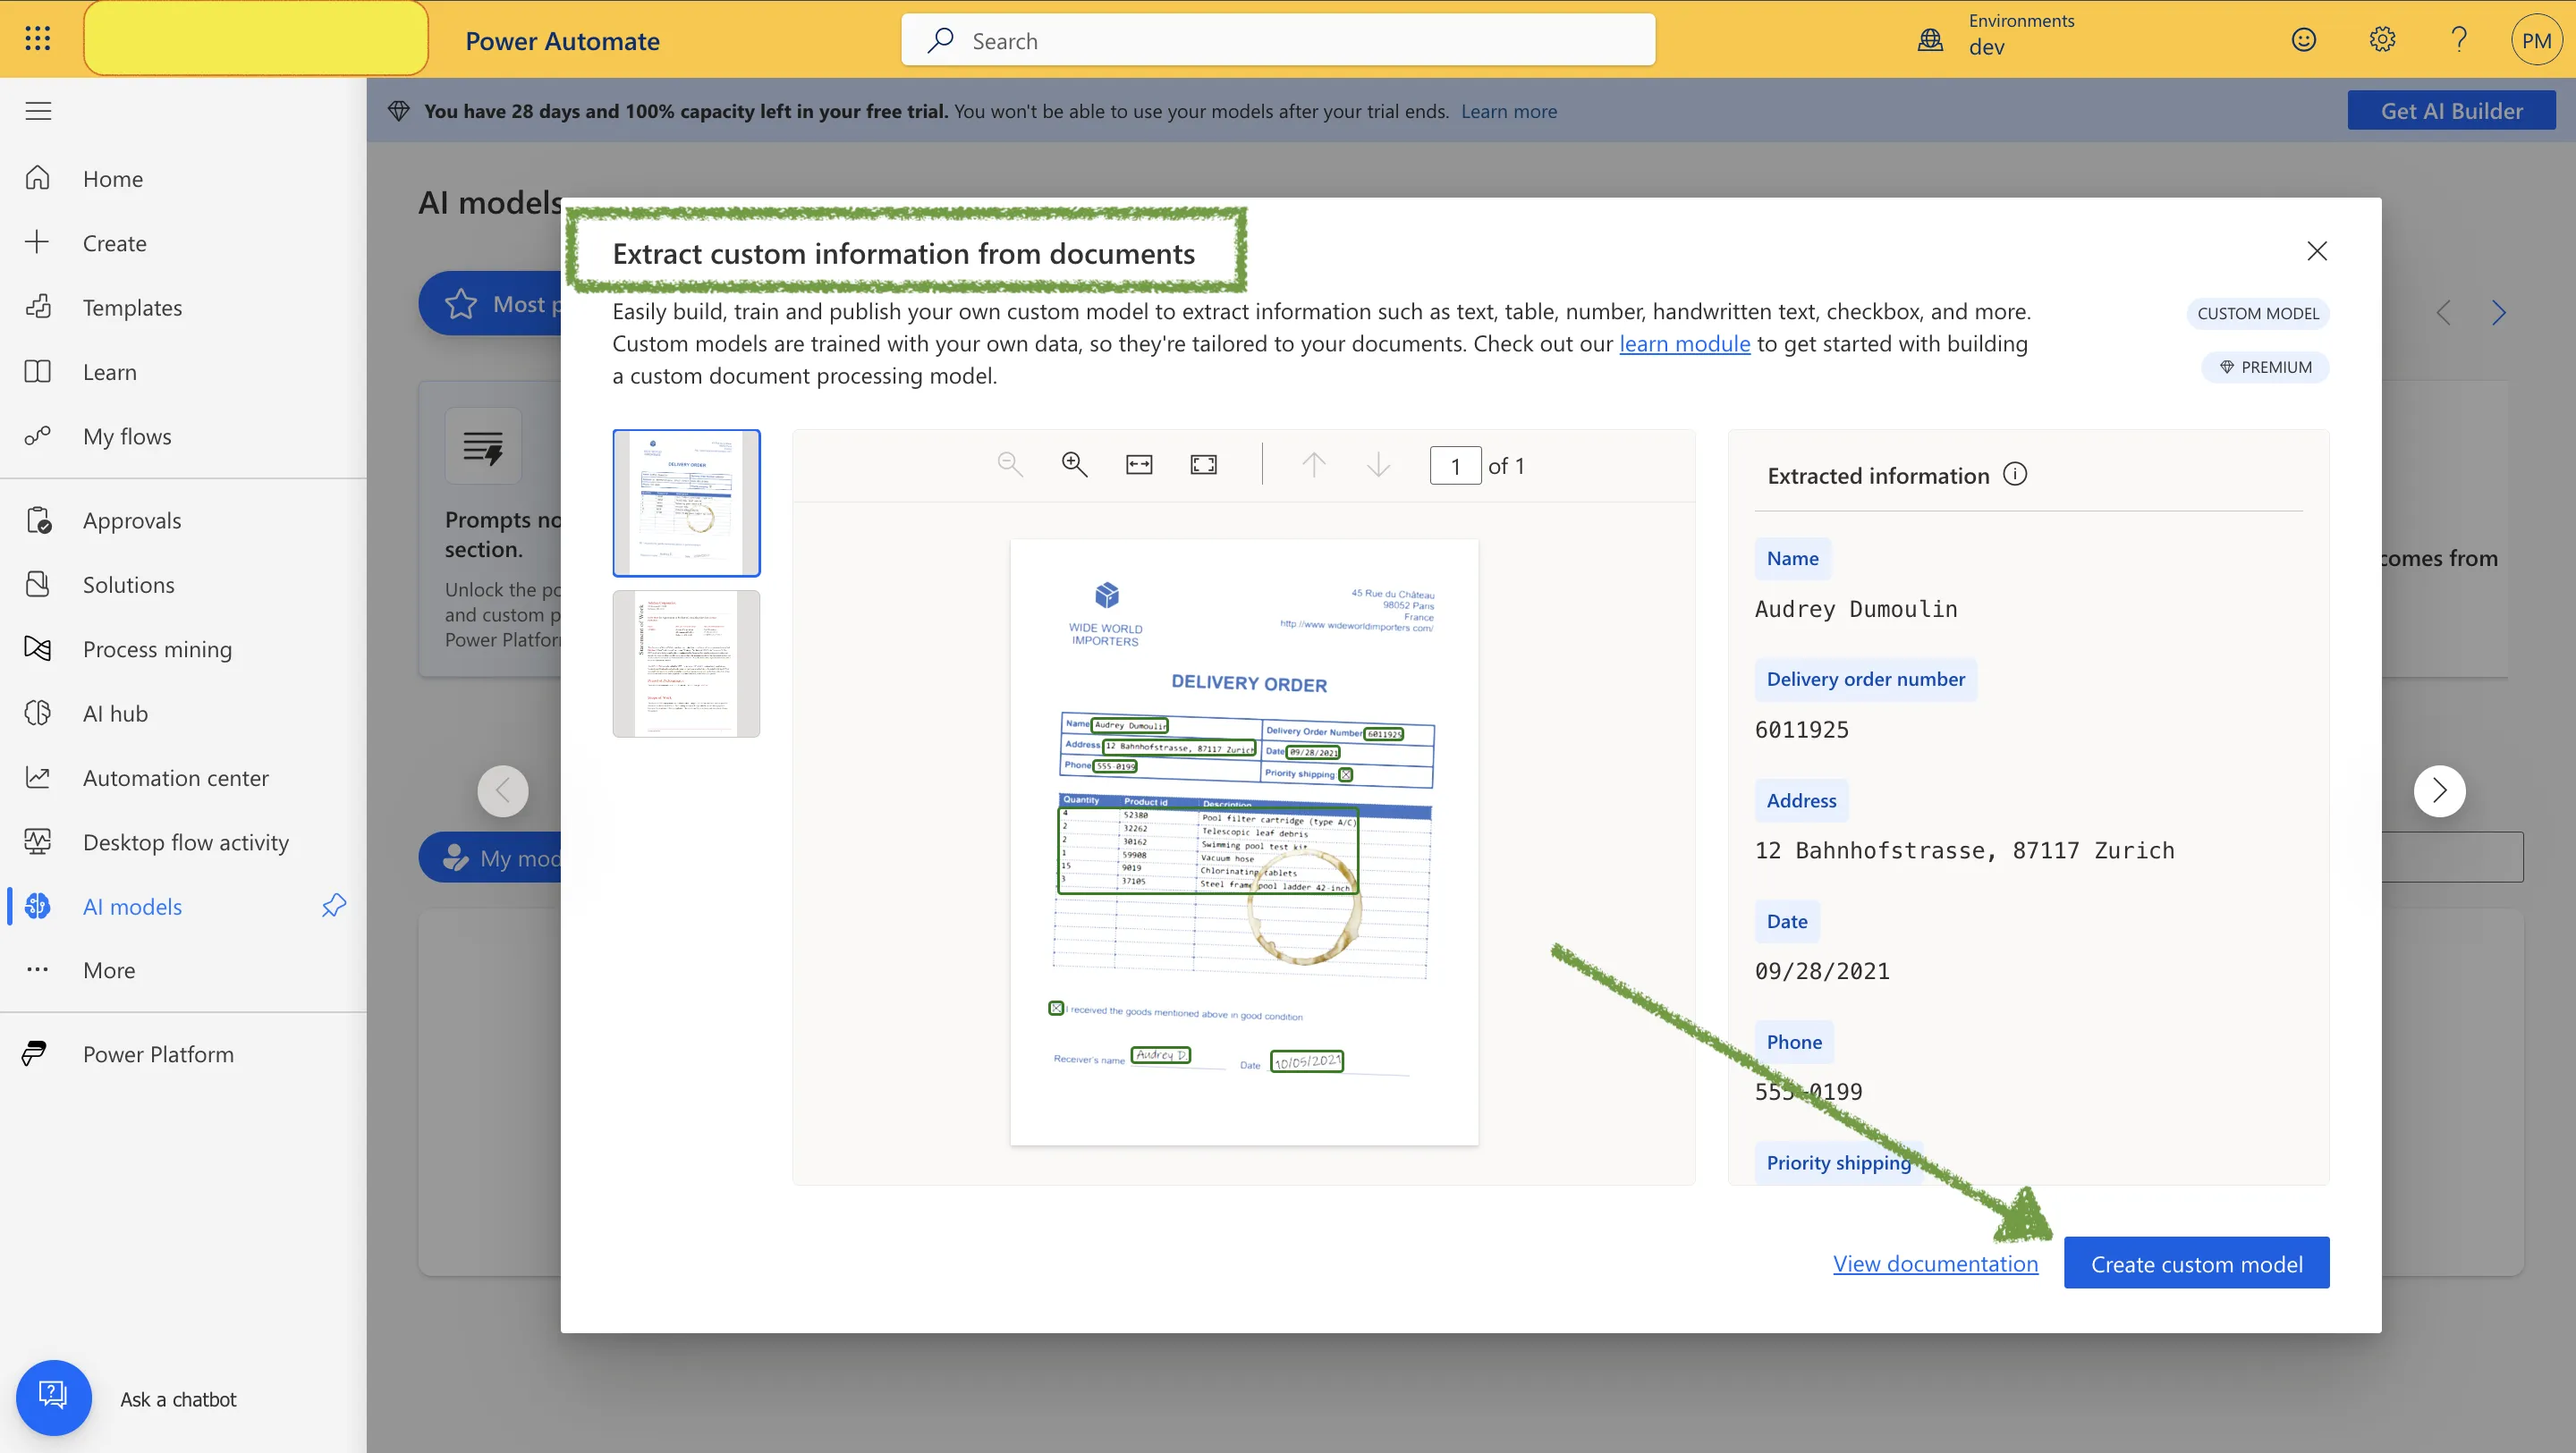
-
Click Create custom model.
-
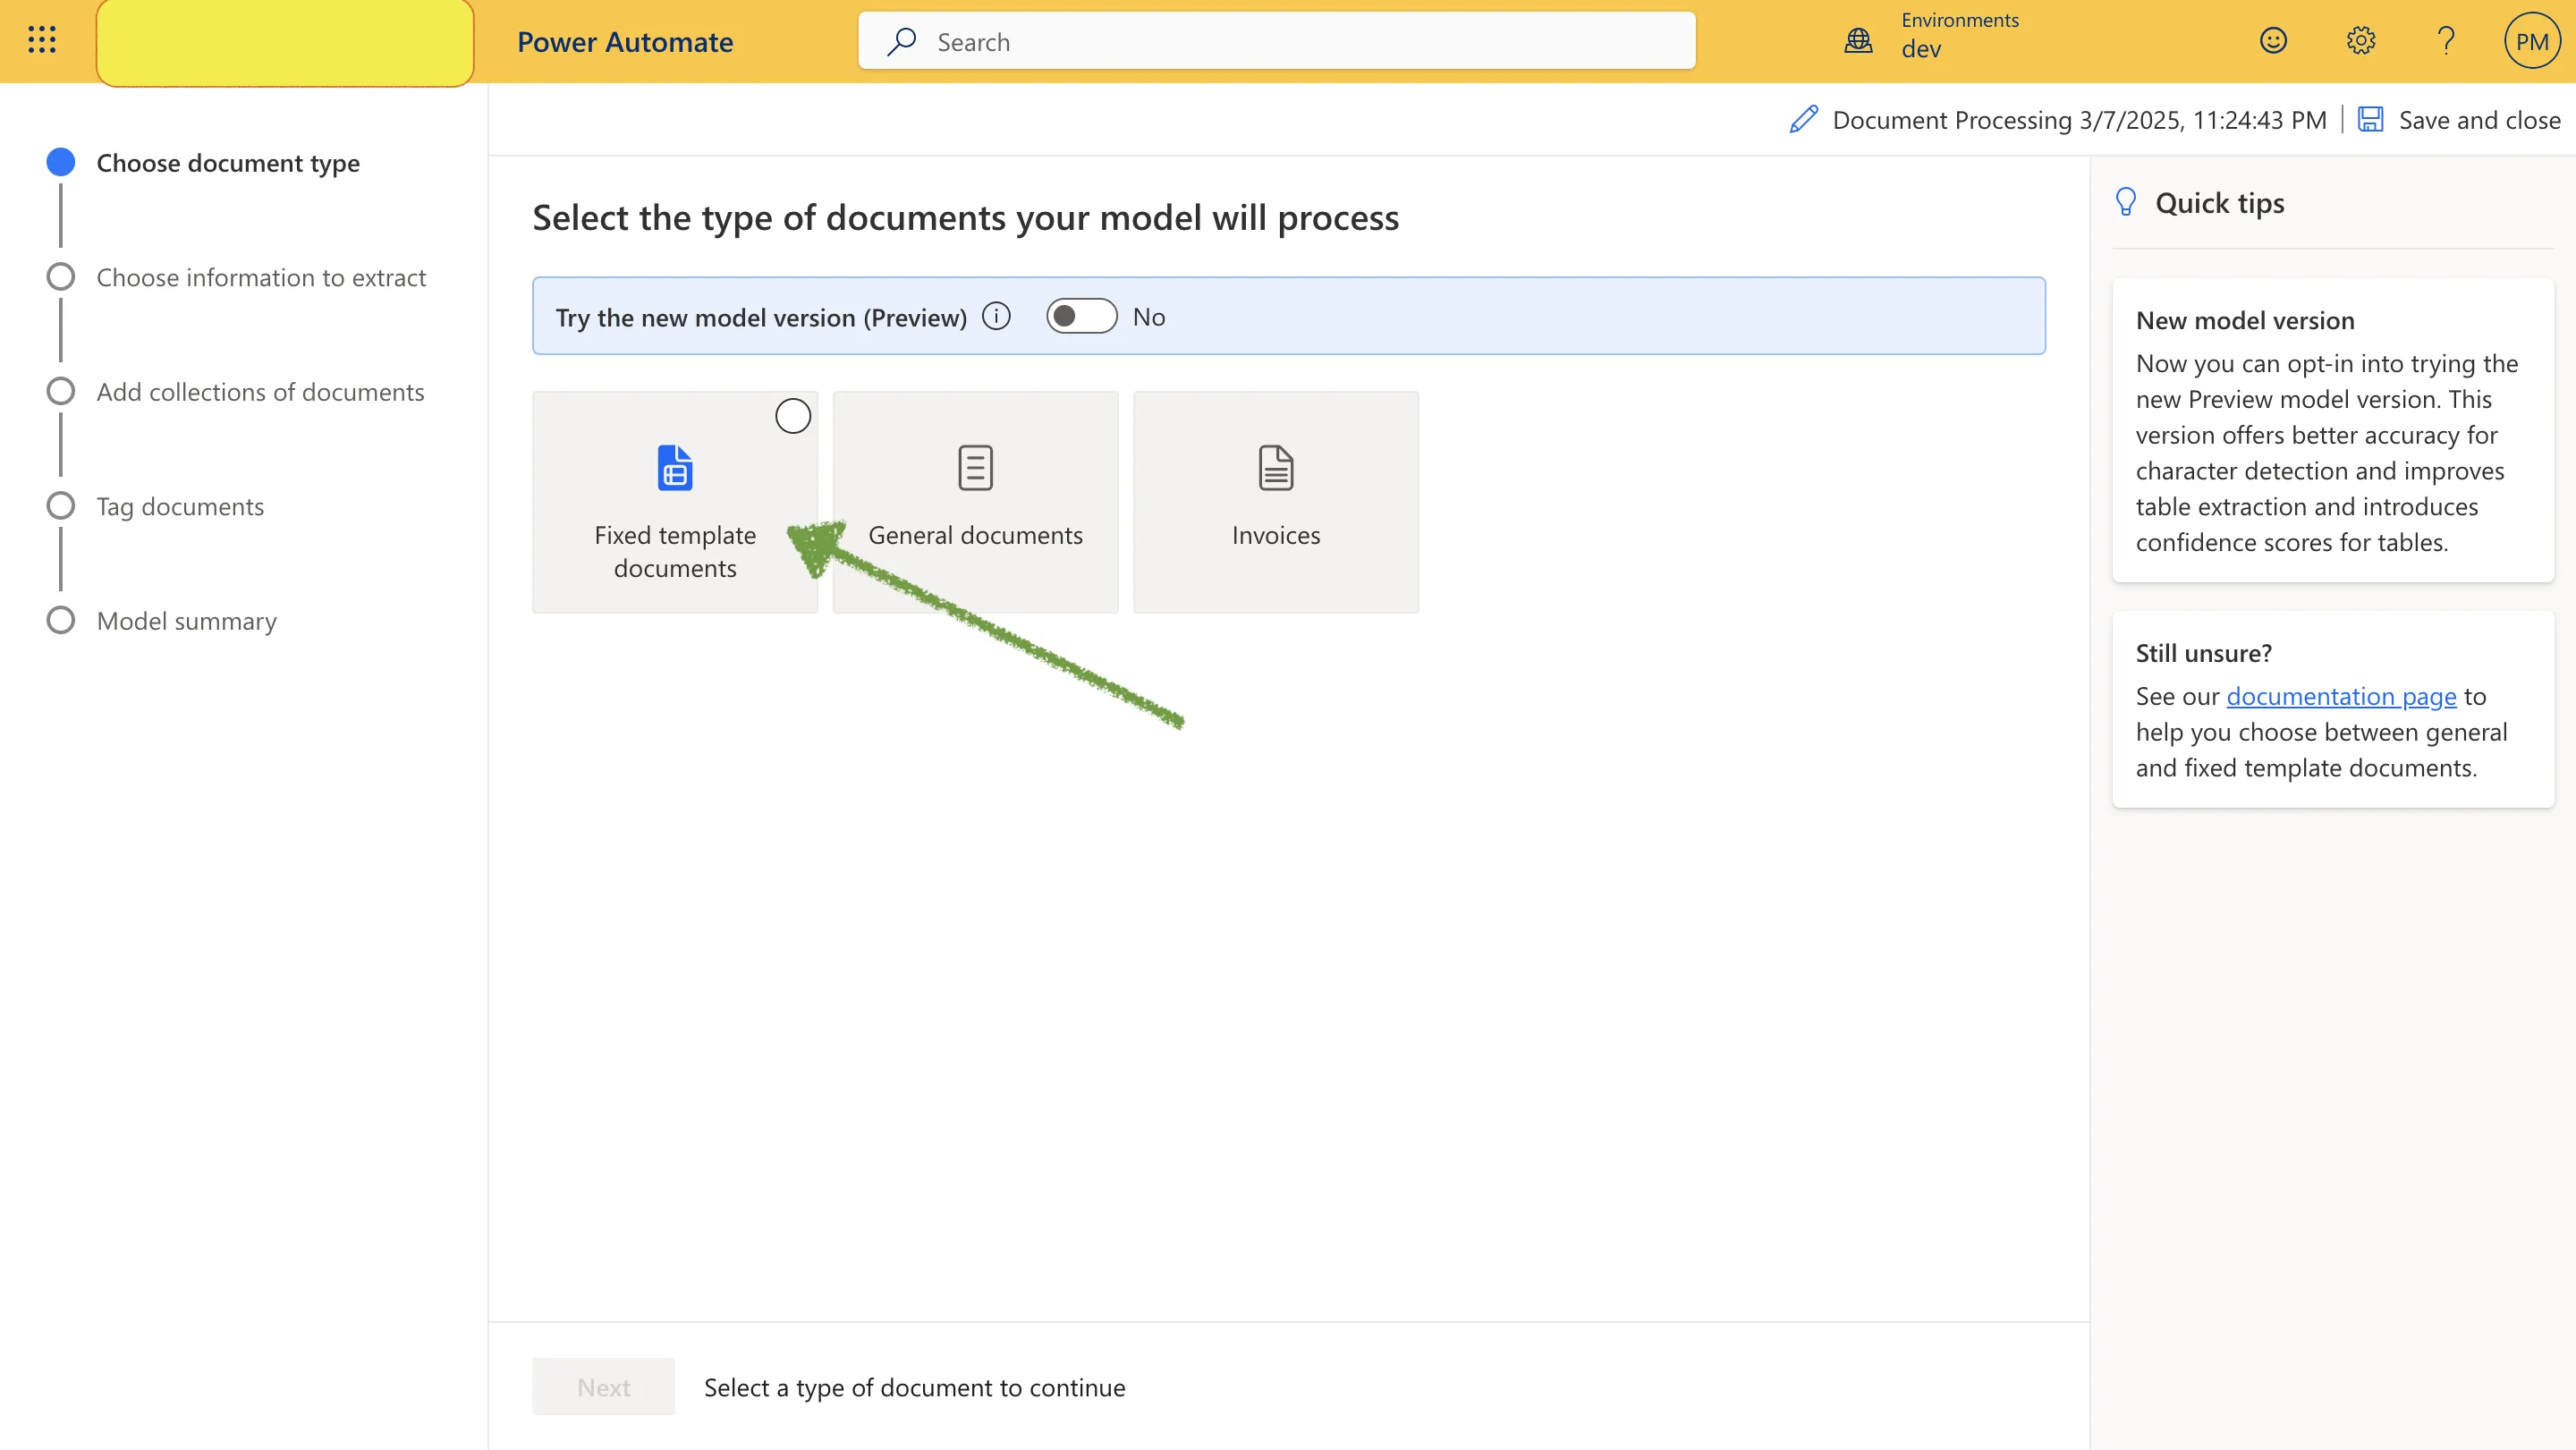
2️⃣ Define the Document Type
- On the Select the type of document your model will process screen, select Fixed template documents and Click Next.
3️⃣ Add Fields to Extract Invoice Information
-
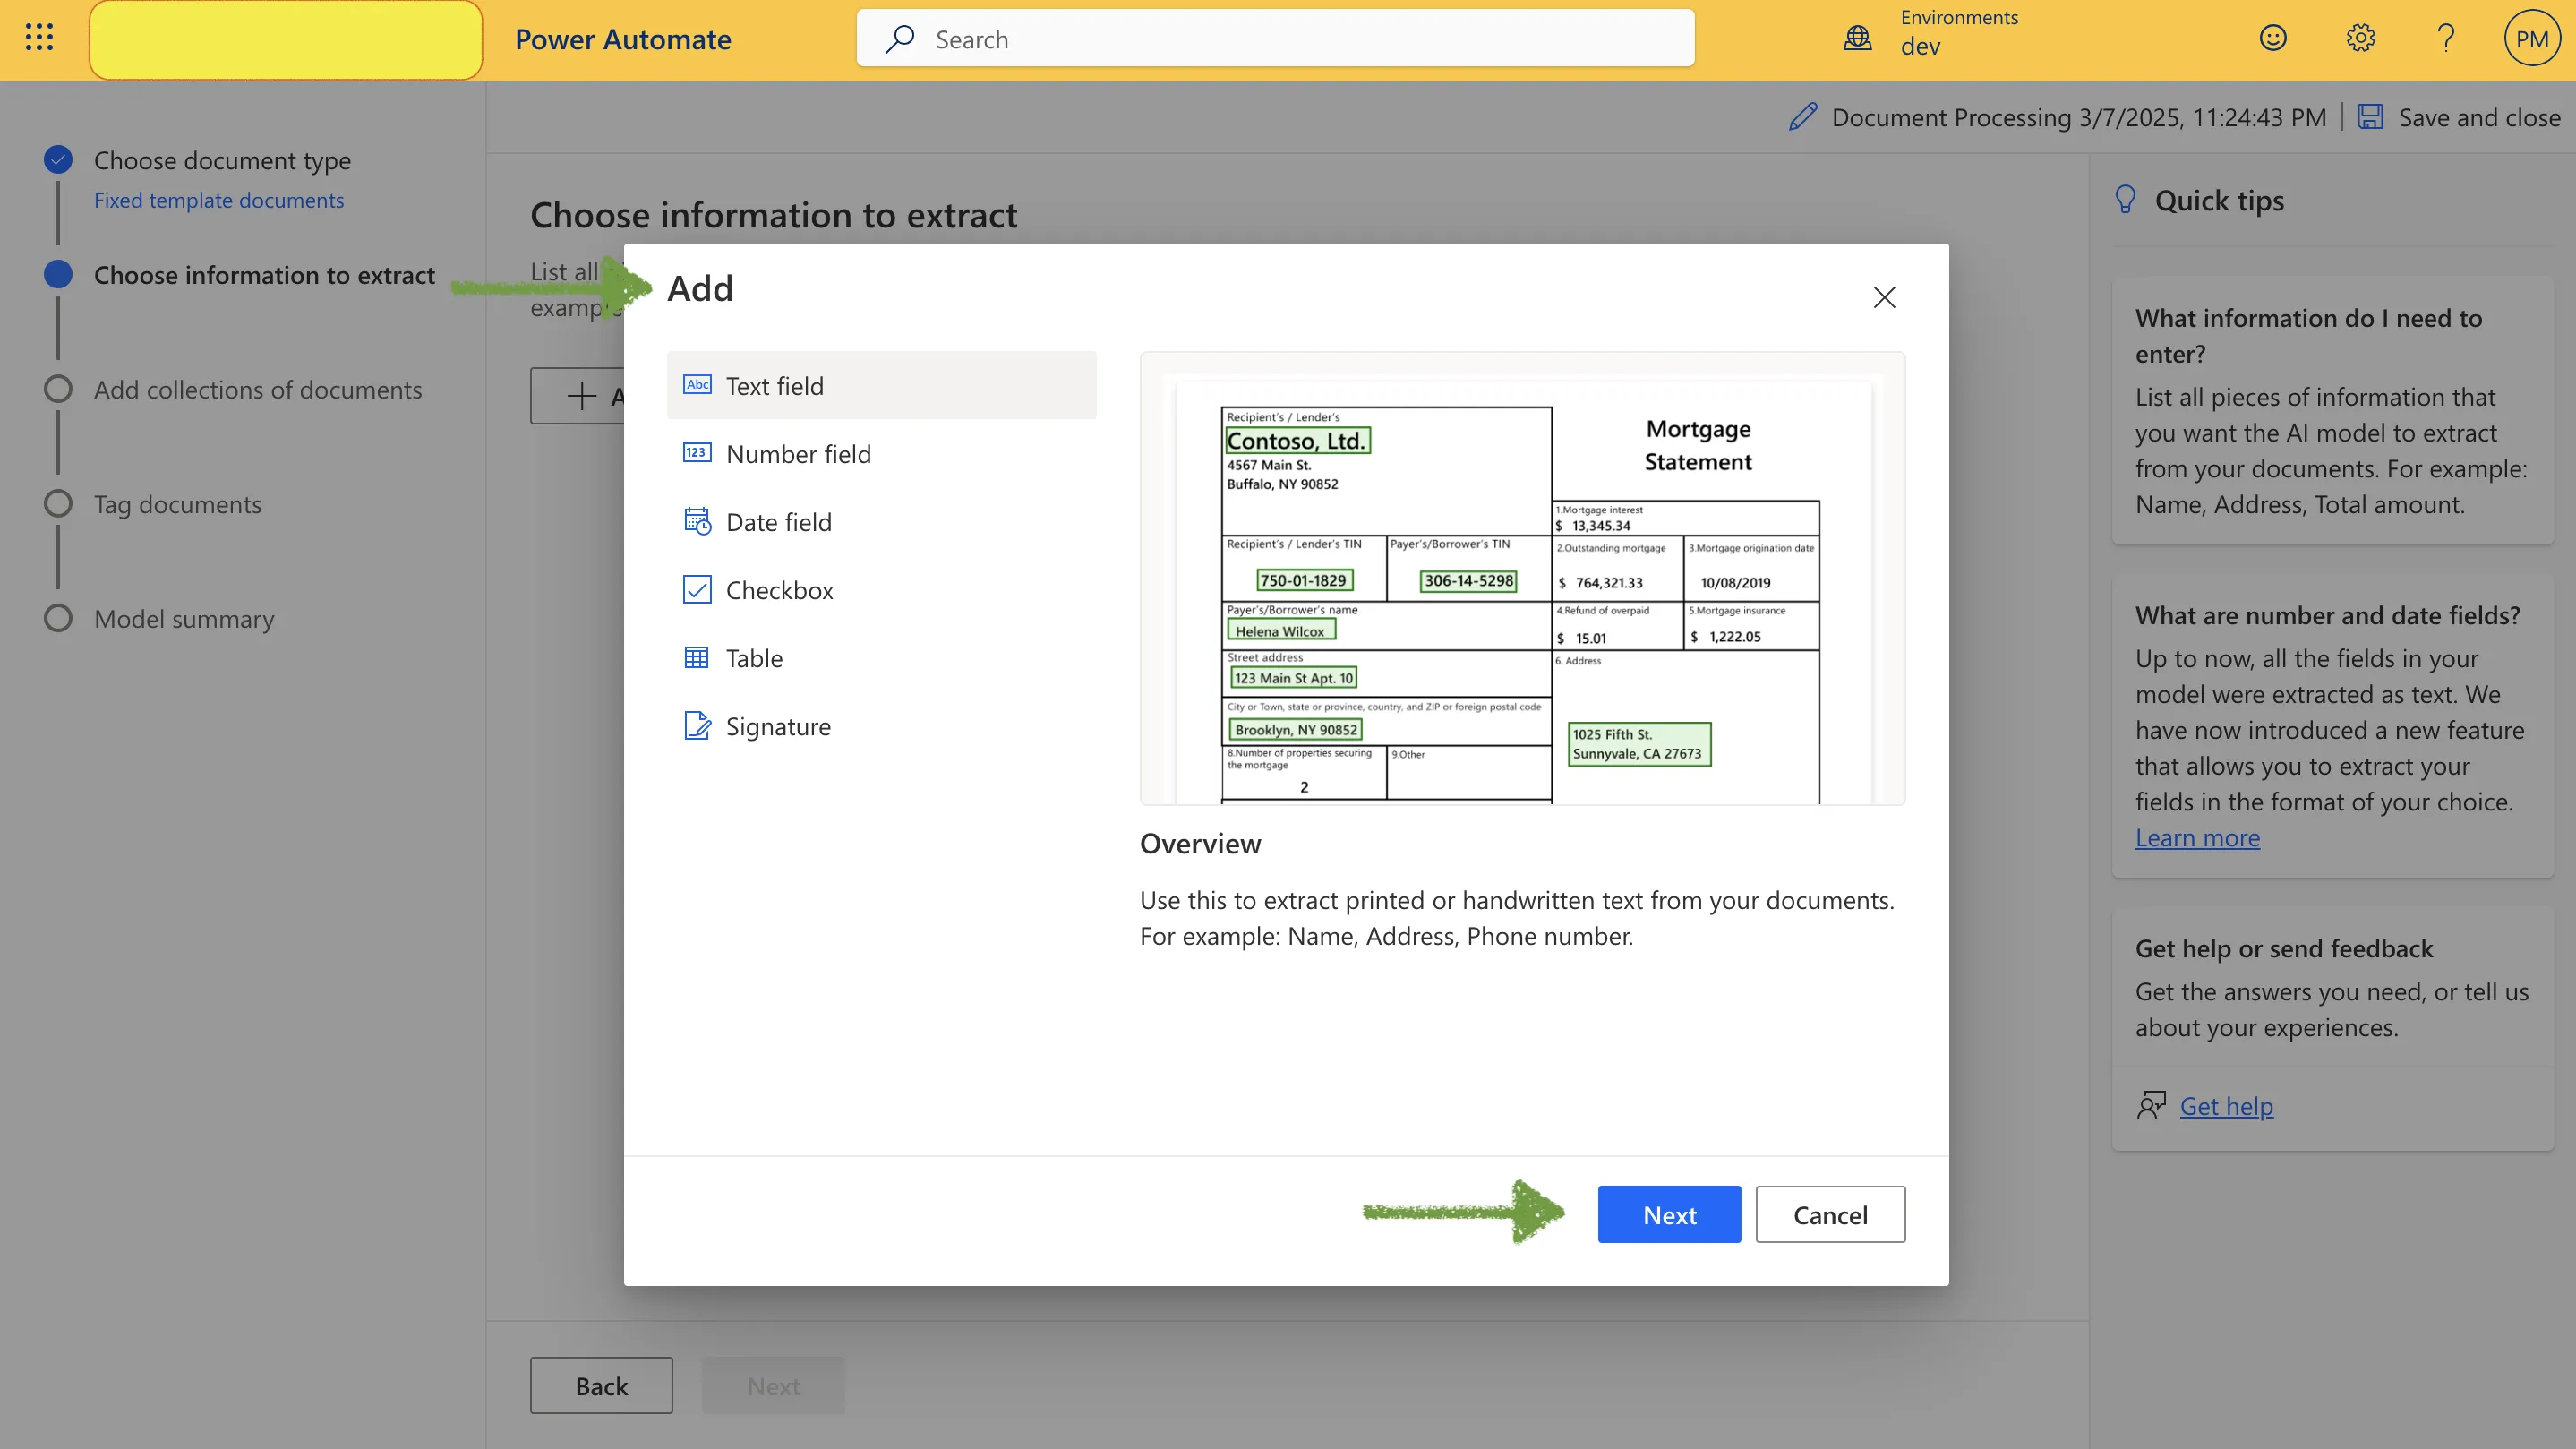
On the Choose information to extract screen, click Add.
-
Select Text Field, then click Next.
-
Set the Name field to
Account, then click **Done`.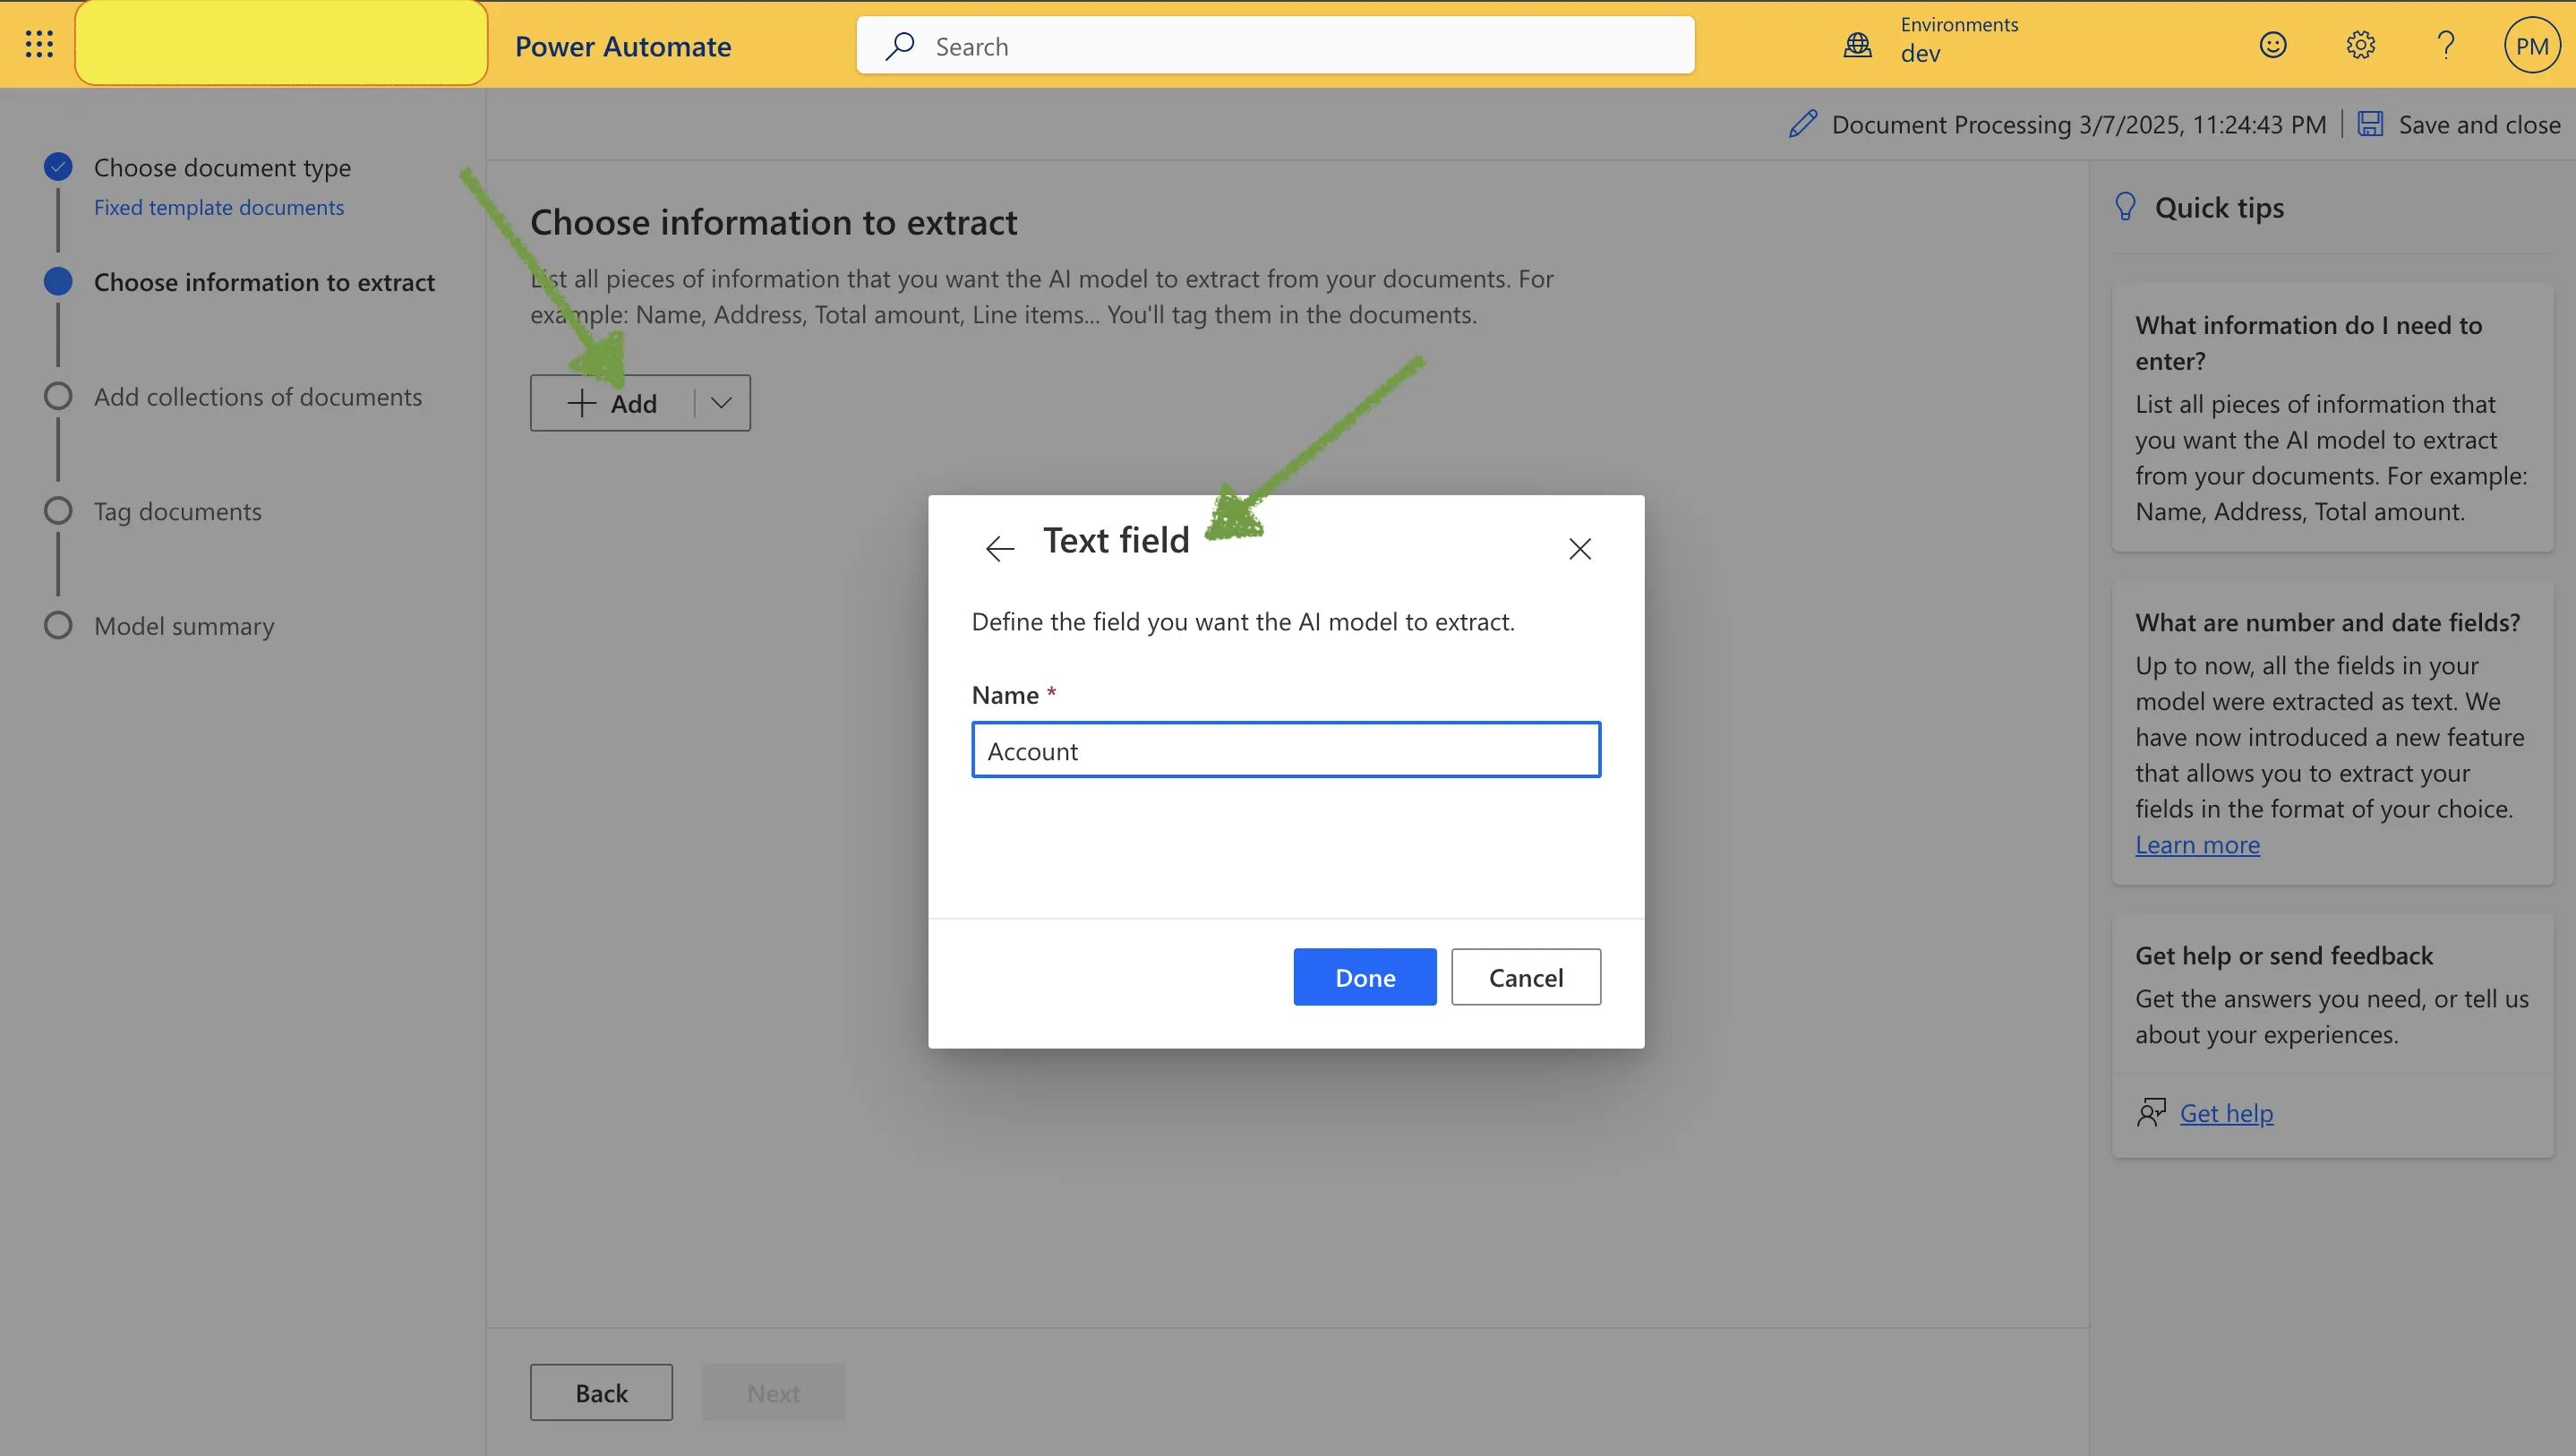
-
-
Repeat Steps 1-3 to add the following Text Fields.
StreetAddressStatePostalCodeInvoiceNum
- Click the Add drop-down and select Date Field.
- Set the Name to
InvoiceDateand choose the formatYear-Month-Day, then click Done.
- Click the Add drop-down again and select Number Field.
- Set the Name to
TotalAmtand choose Use dot (.) as decimal separator, then click Done.
4️⃣ Add Table for Line Items
Invoices often contain multiple line items. We need to extract Quantity, Description, Unit Price, and Line Total for each invoice.
- Click the Add drop-down and select Table.
- Name the table LineItems.
- Click Column 1, then select Edit Column.
- Rename it to
Qtyand set Type toNumber, then click Confirm.
- Rename it to
- Click New Column:
- Set Name to
Description, Type toText, then click Add.
- Set Name to
- Click New Column again:
- Set Name to
Unit Price, Type toNumber, then click Add.
- Set Name to
- Click New Column one more time:
- Set Name to
Line Total, Type toNumber, then click Add. - Click Done.
 Your completed table should now be configured to extract line items dynamically.
- Set Name to
5️⃣ Upload Training Documents
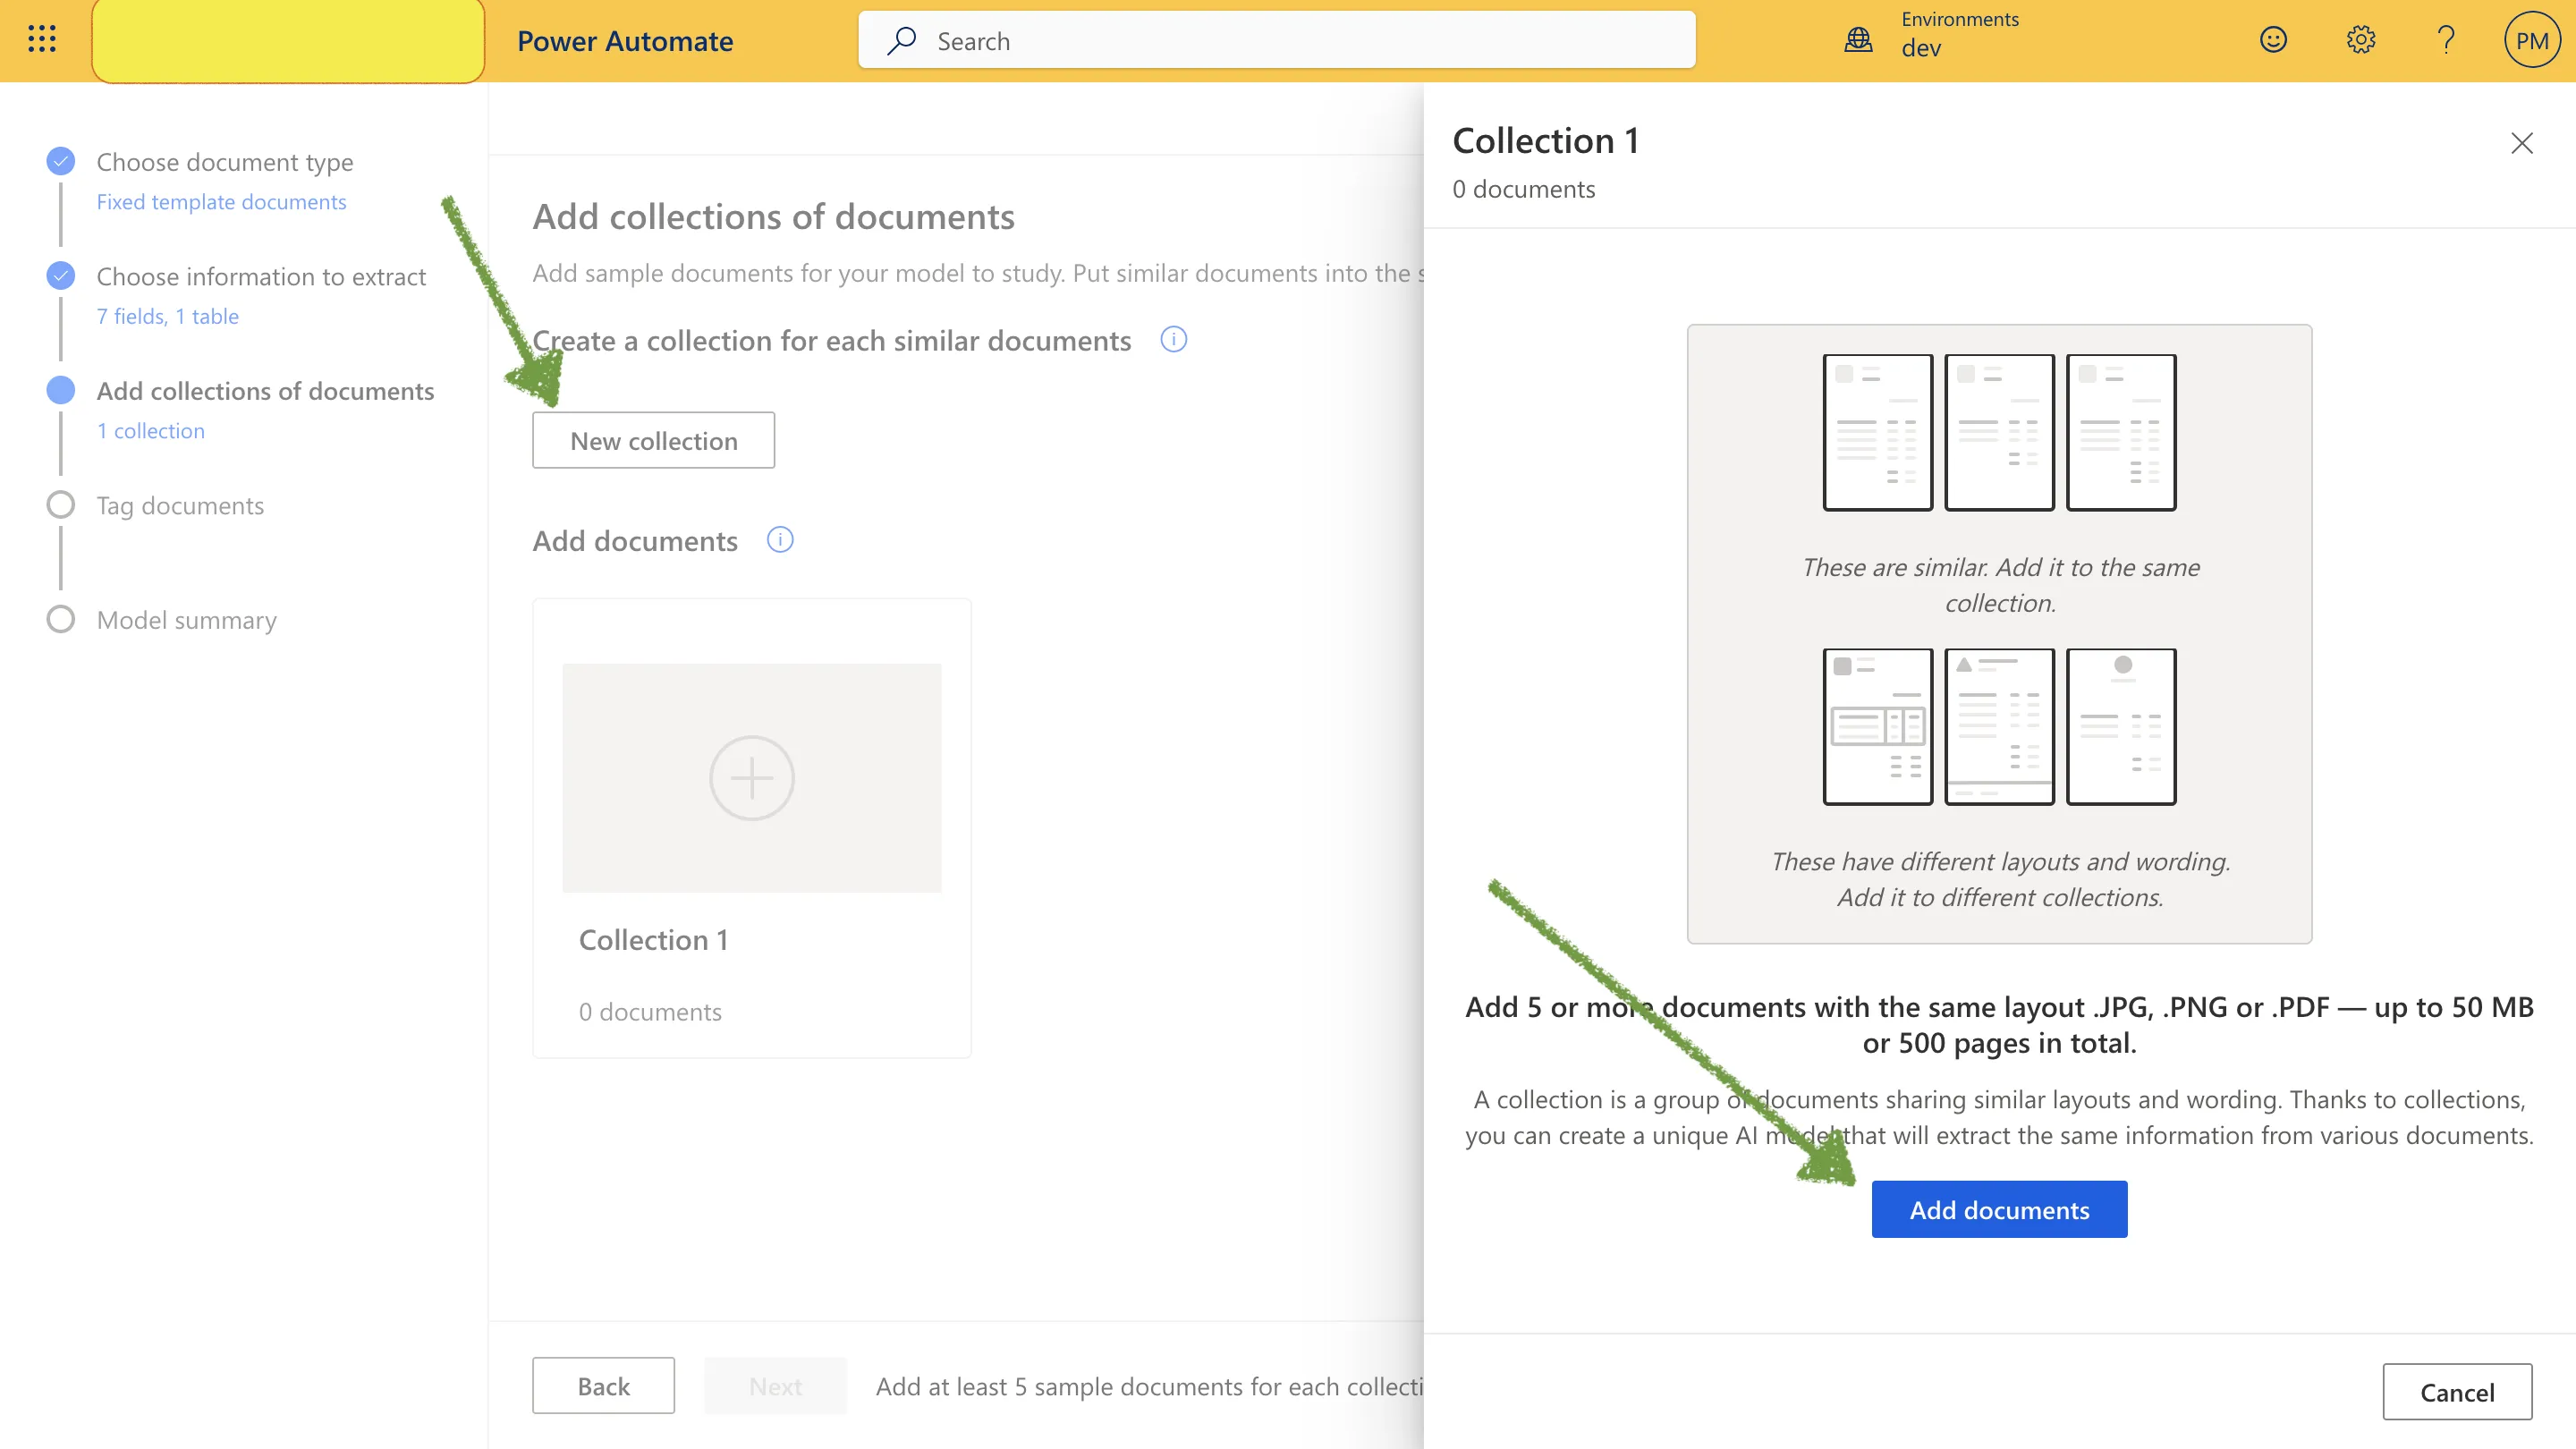
- Click Next to proceed to the Add collections of documents screen.
- Click New collection.
- Click the + button on Collection 1.
- Click Add Documents.
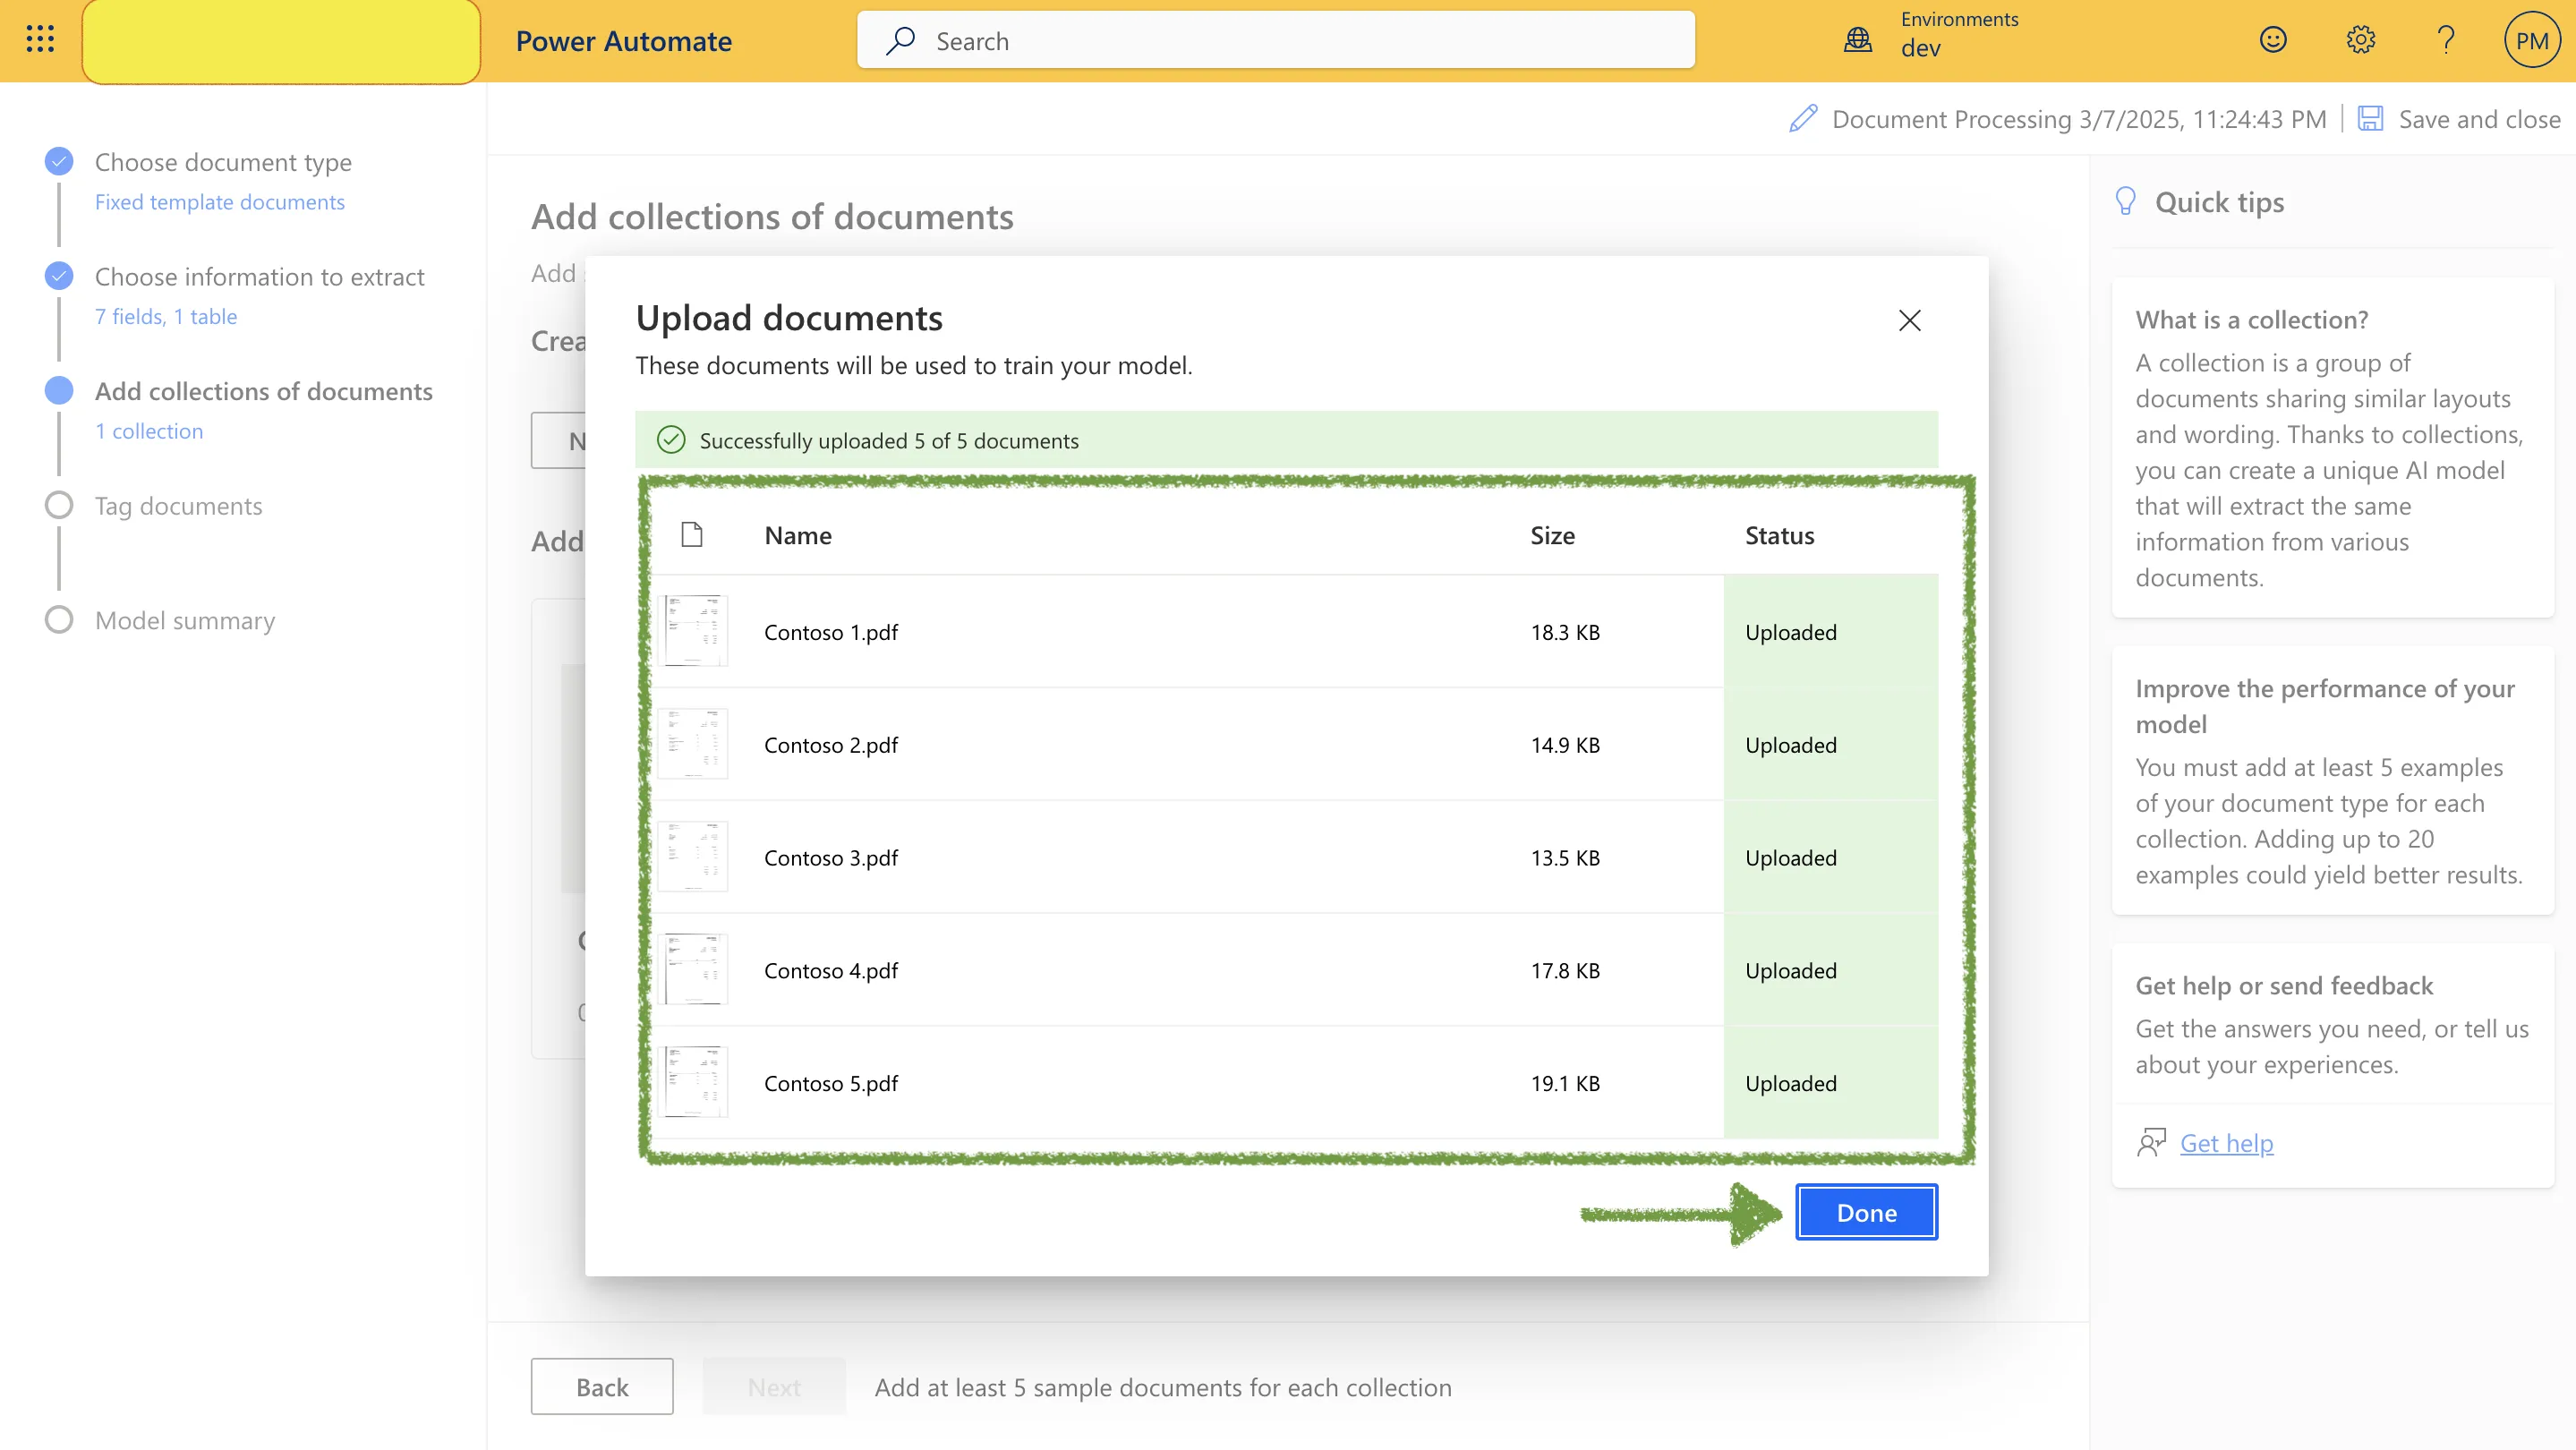
- Select My Device, then locate and upload your 5 sample invoice files.
- Click Upload 5 documents, then click Done.
6️⃣ Tag Documents for AI Training
- On the Tag documents screen, manually highlight and tag fields in the invoice preview.
- Drag a rectangle around each field and assign the correct Tag:
- Account Name:
Adatum Corporation - Street Address:
234 France Ave - State:
WA - Postal Code:
76328 - Invoice Number:
1783(or similar) - Invoice Date:
Oct 23, 2016 - Total Amount:
90.20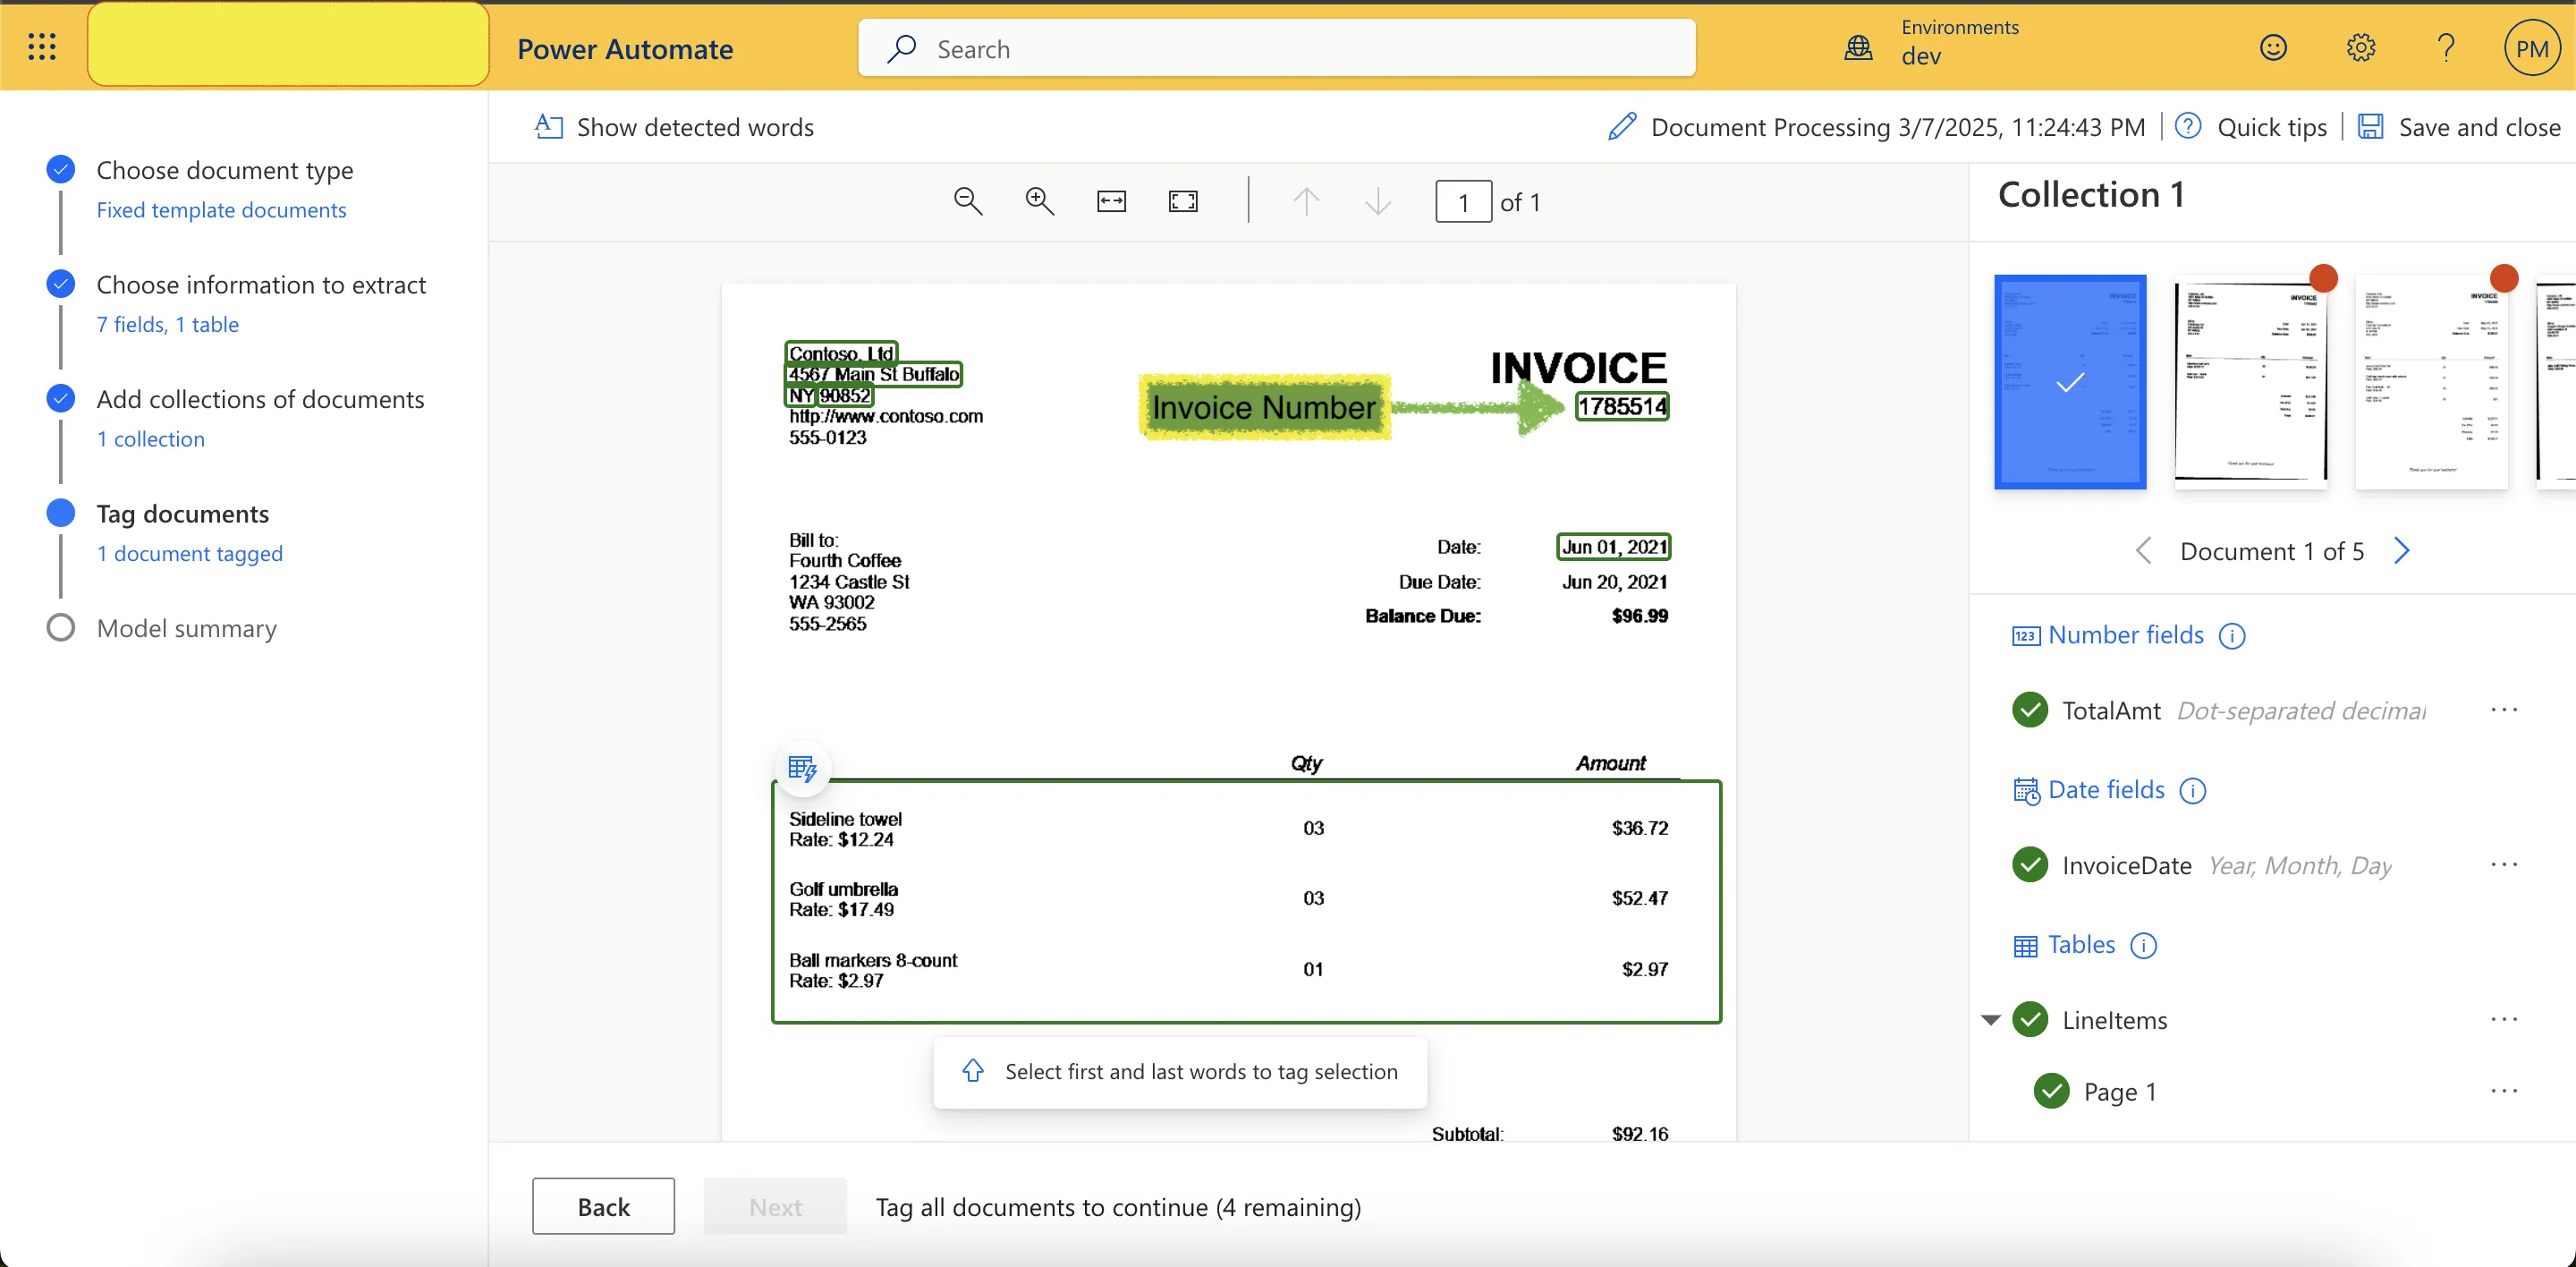
- Account Name:
- Drag a rectangle around the table section and tag it as LineItems.
- If prompted with a table selection wizard, click Close.
- Click under each table row to mark it as a new row.
- Click the A button above
QUANTITYand select the Qty tag. - Repeat the process for DESCRIPTION, UNIT PRICE, and LINE TOTAL.
✅ You must repeat this tagging process for all 5 training documents.
📌 Once a document is fully tagged, a ✅ checkmark will appear on it.
7️⃣ Train & Publish the Model
-
Click Next after tagging all documents.
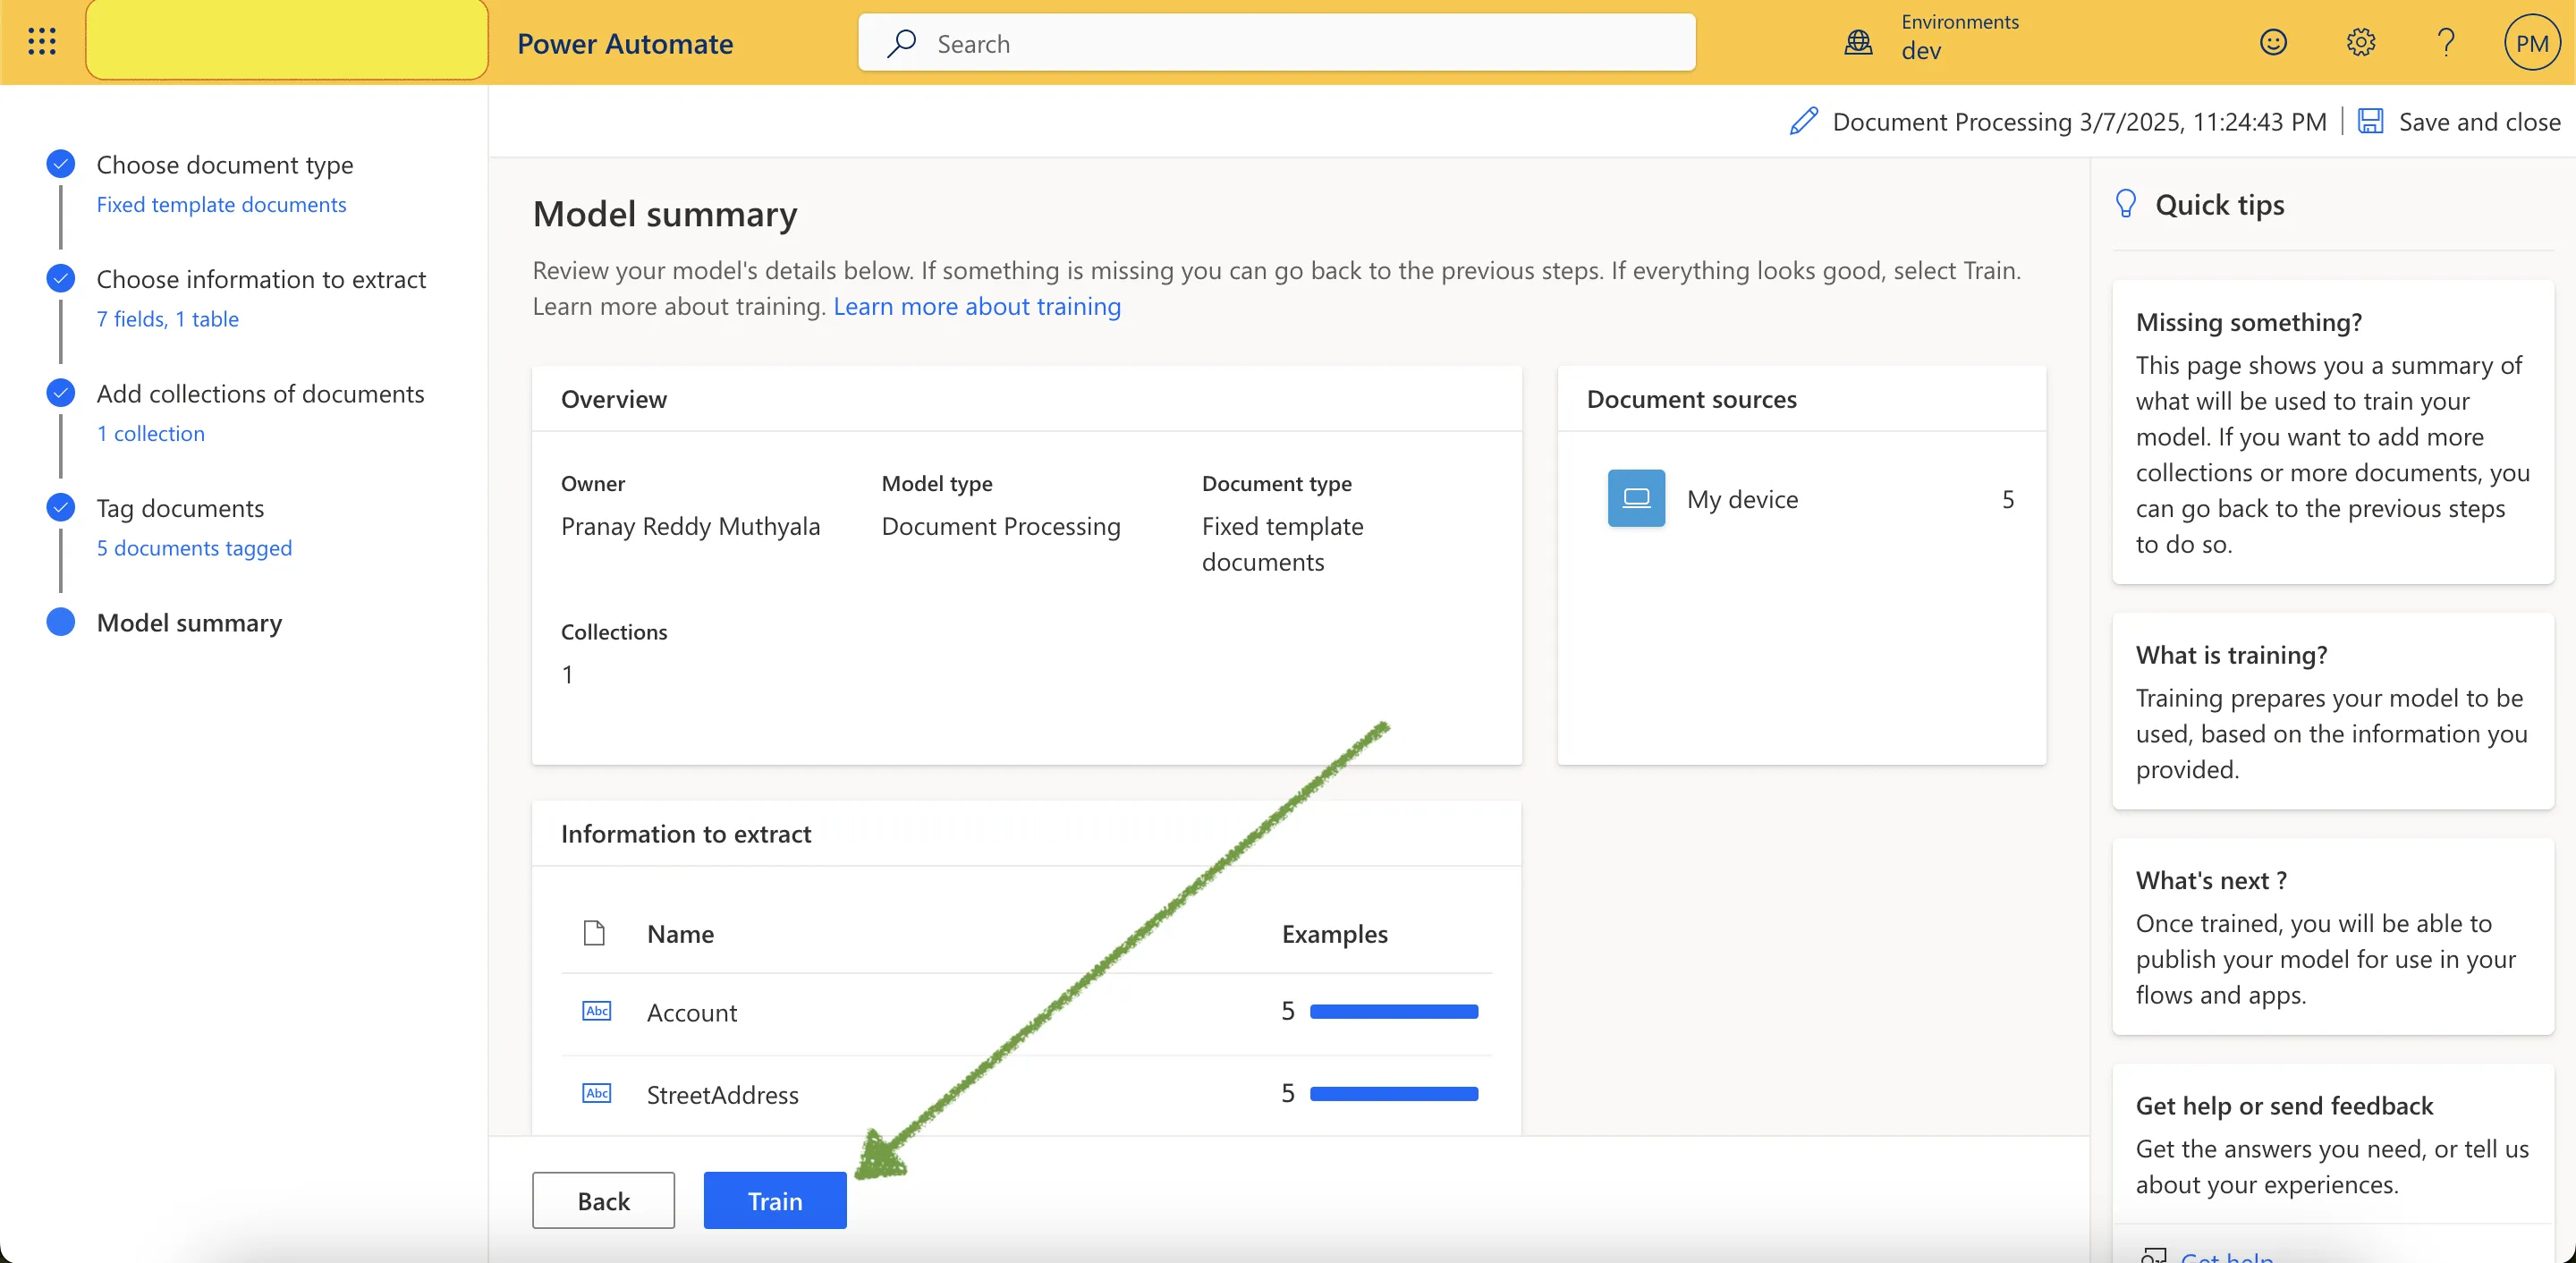
-
On the Model Summary screen, click Train.
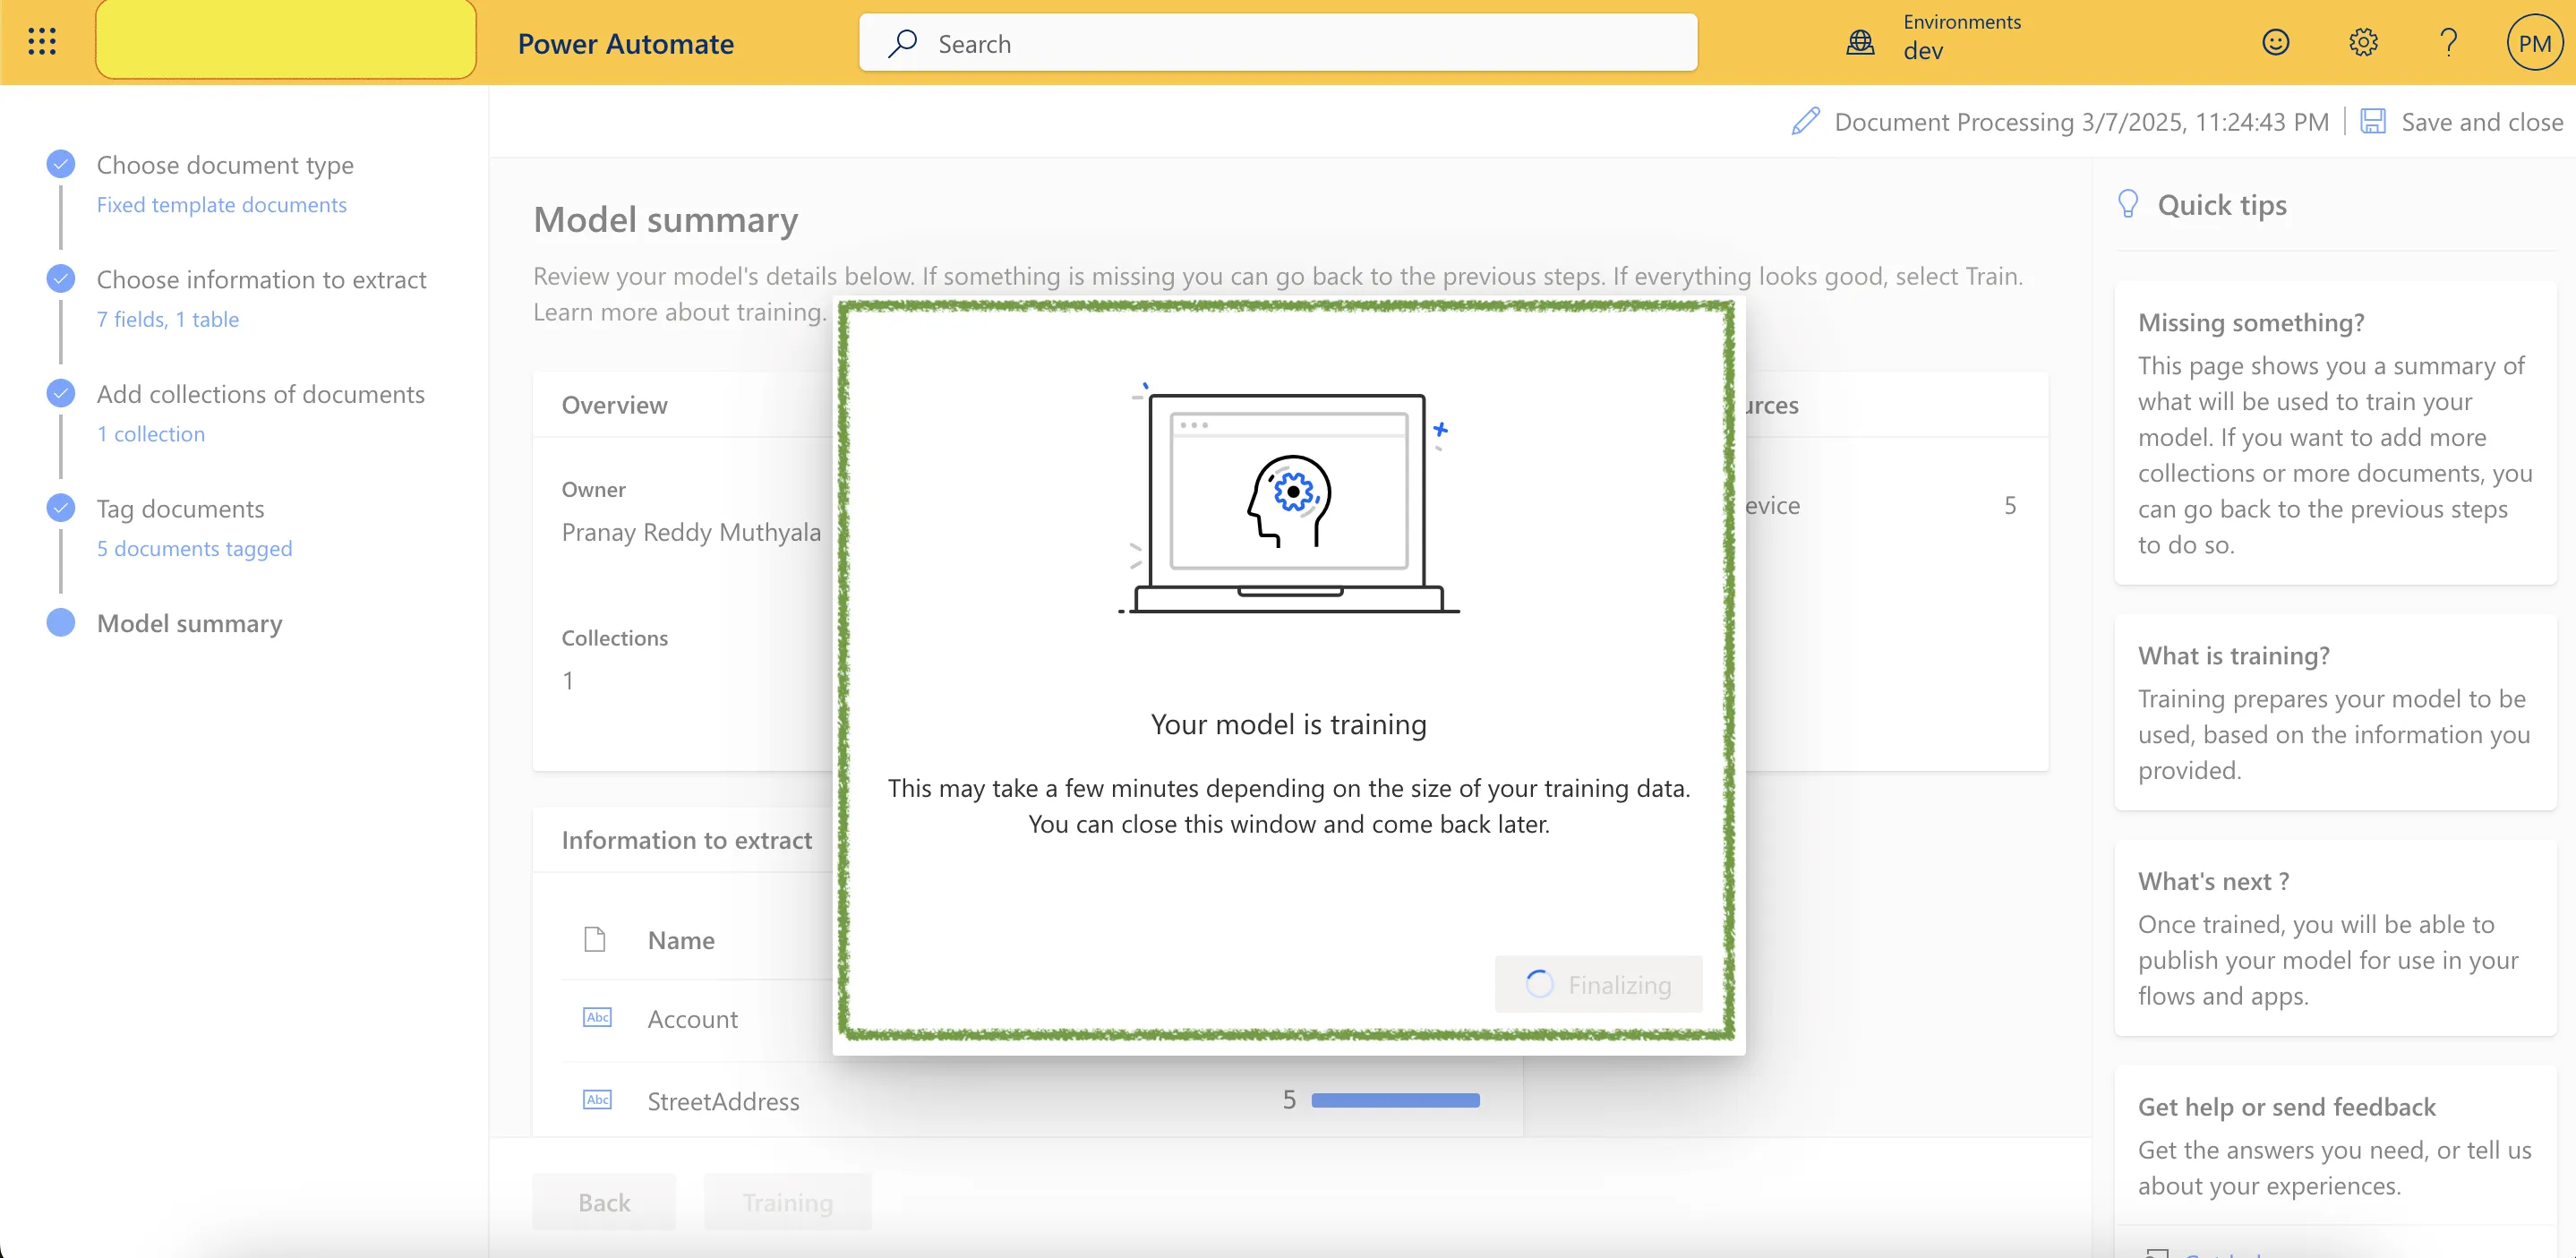
- 🚀 Training may take several minutes.
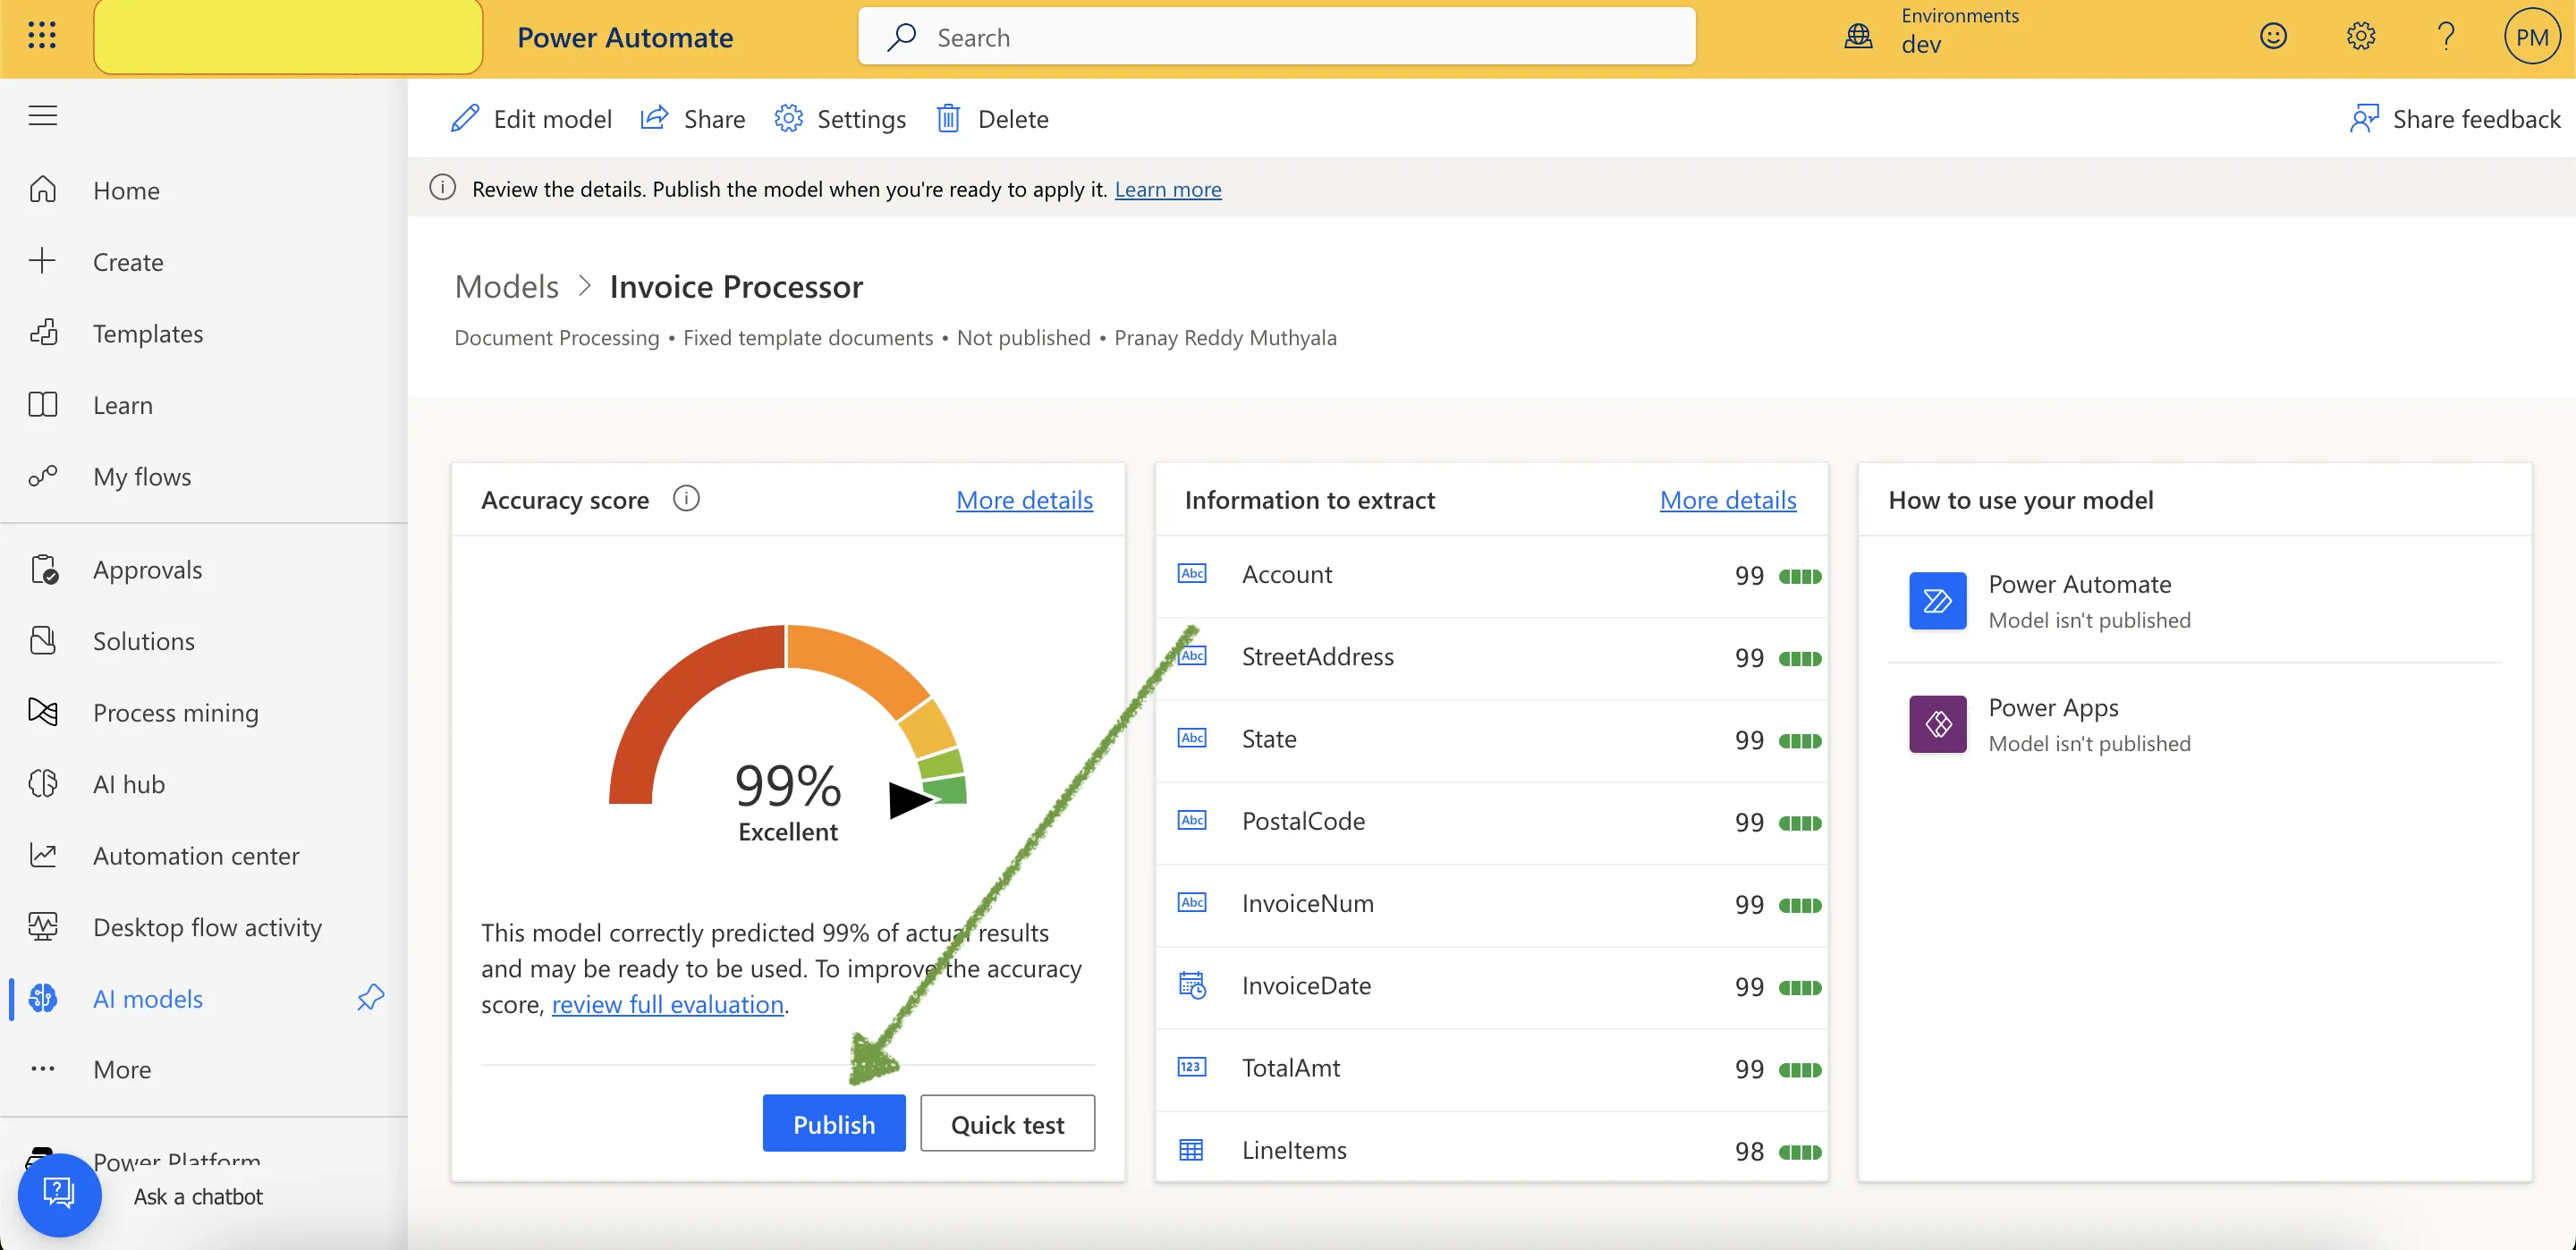
- Once training is complete, click Publish to make the model available for use.
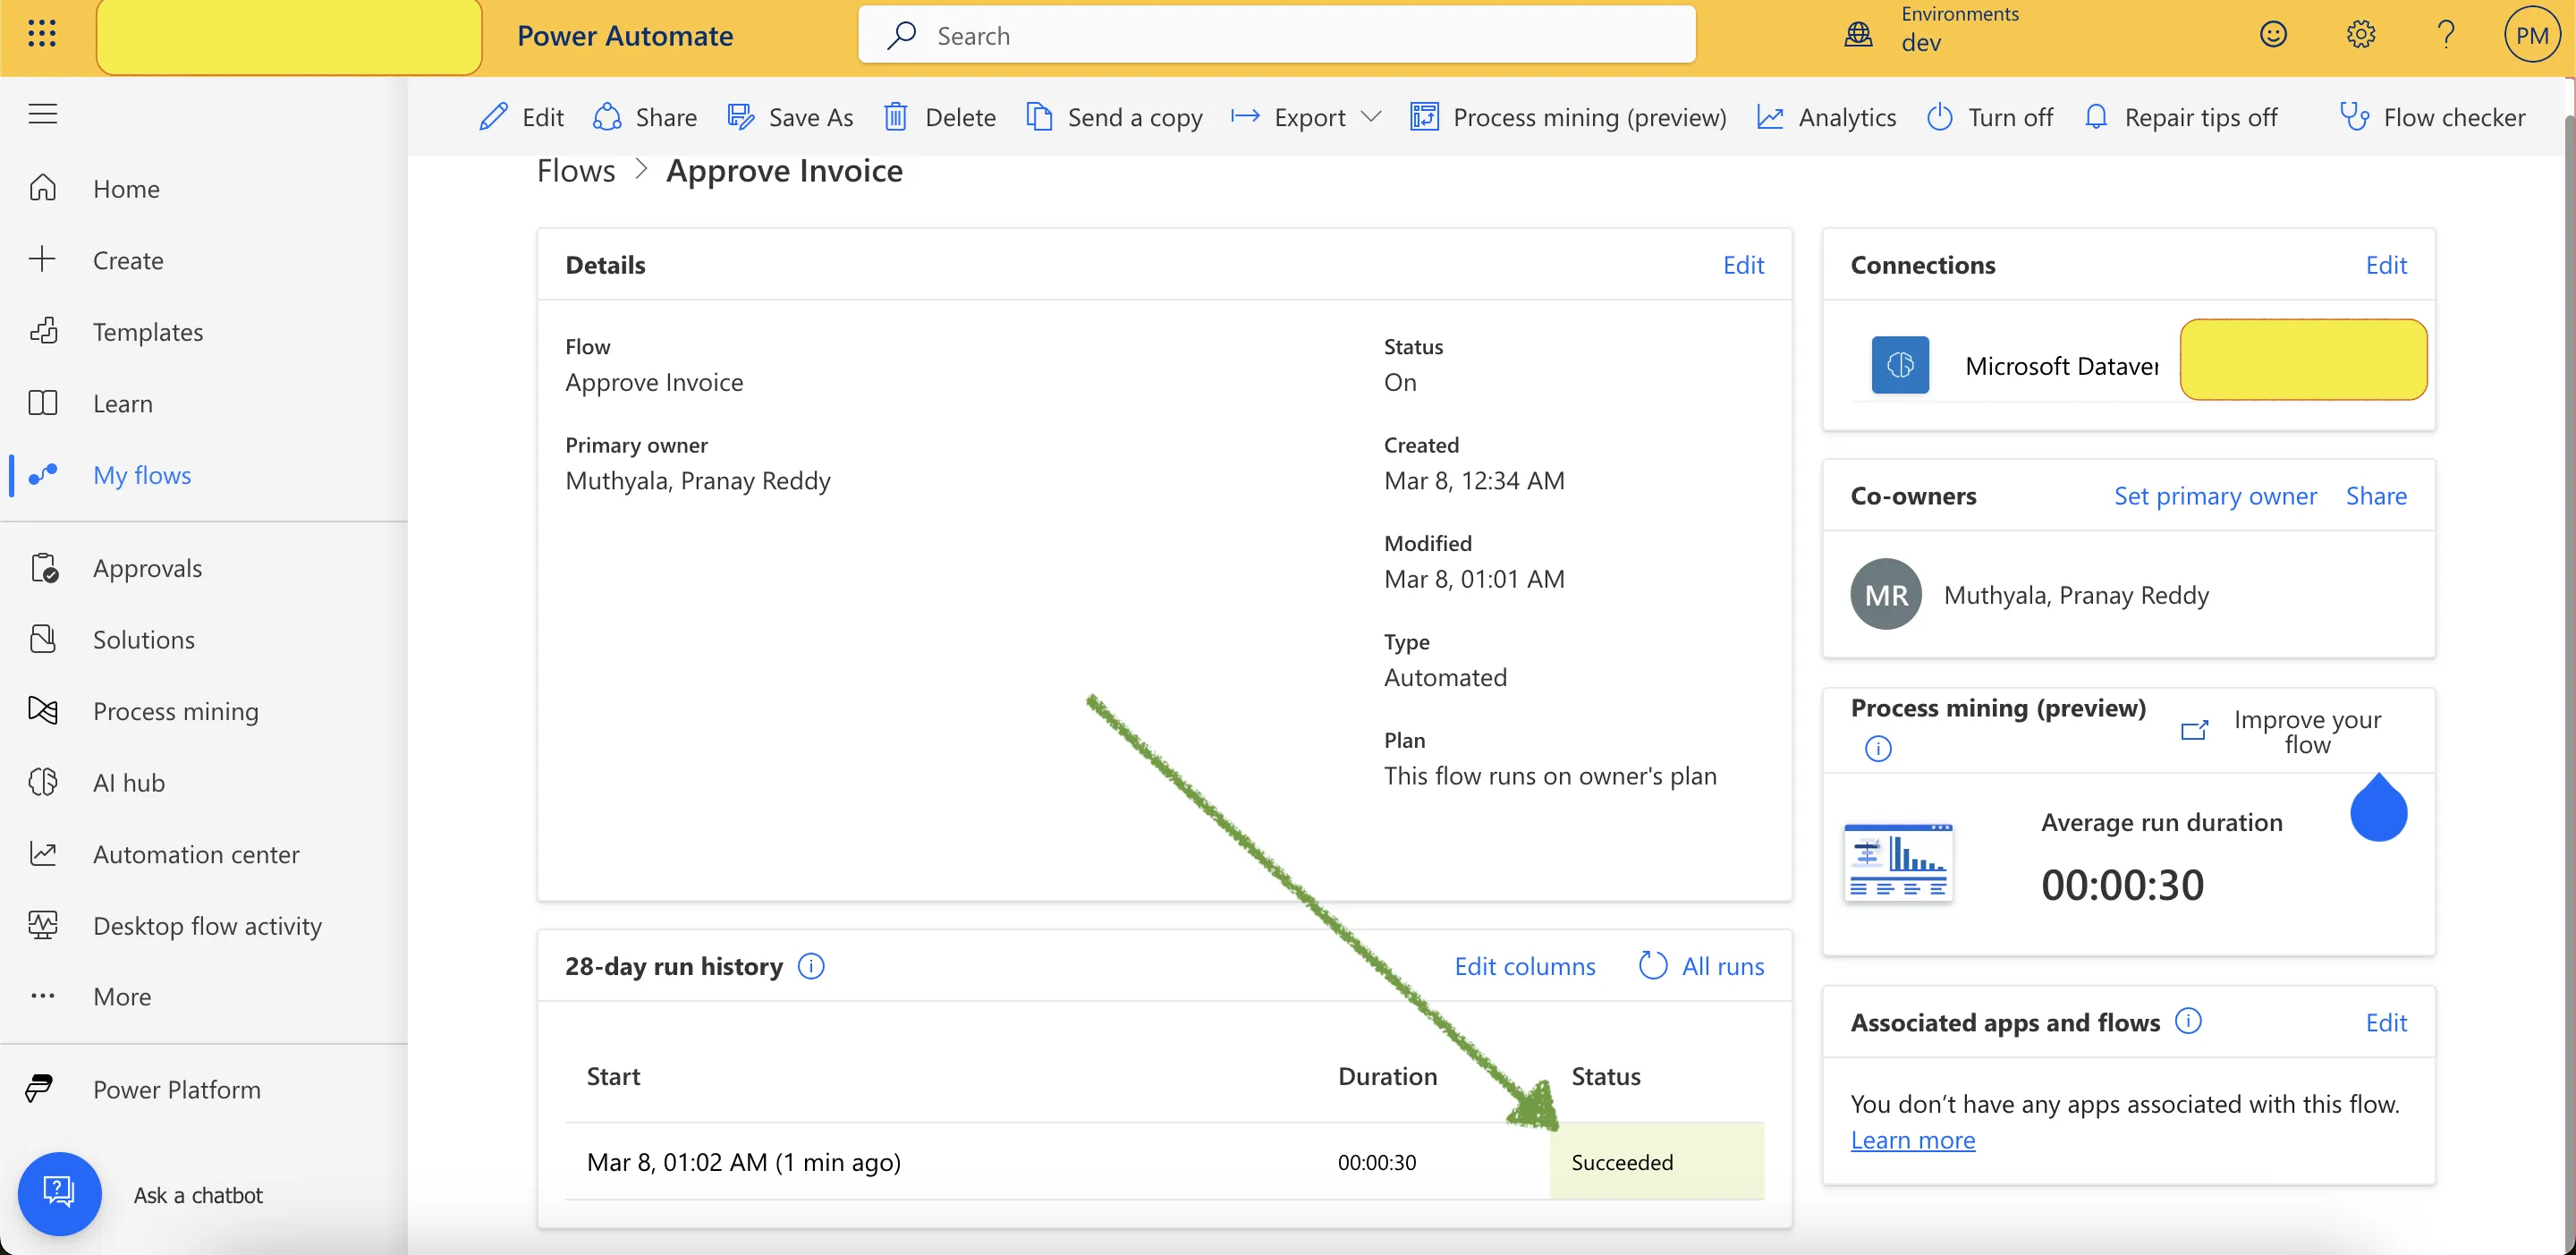
📌 Steps to Build Approval Flow
1️⃣ Create a New Automated Flow in Power Automate
- Sign in to Power Automate:
- Navigate to the Power Automate portal.
- Initiate a New Flow:
- Click on Create in the left-hand menu.
- Select Automated Cloud Flow.
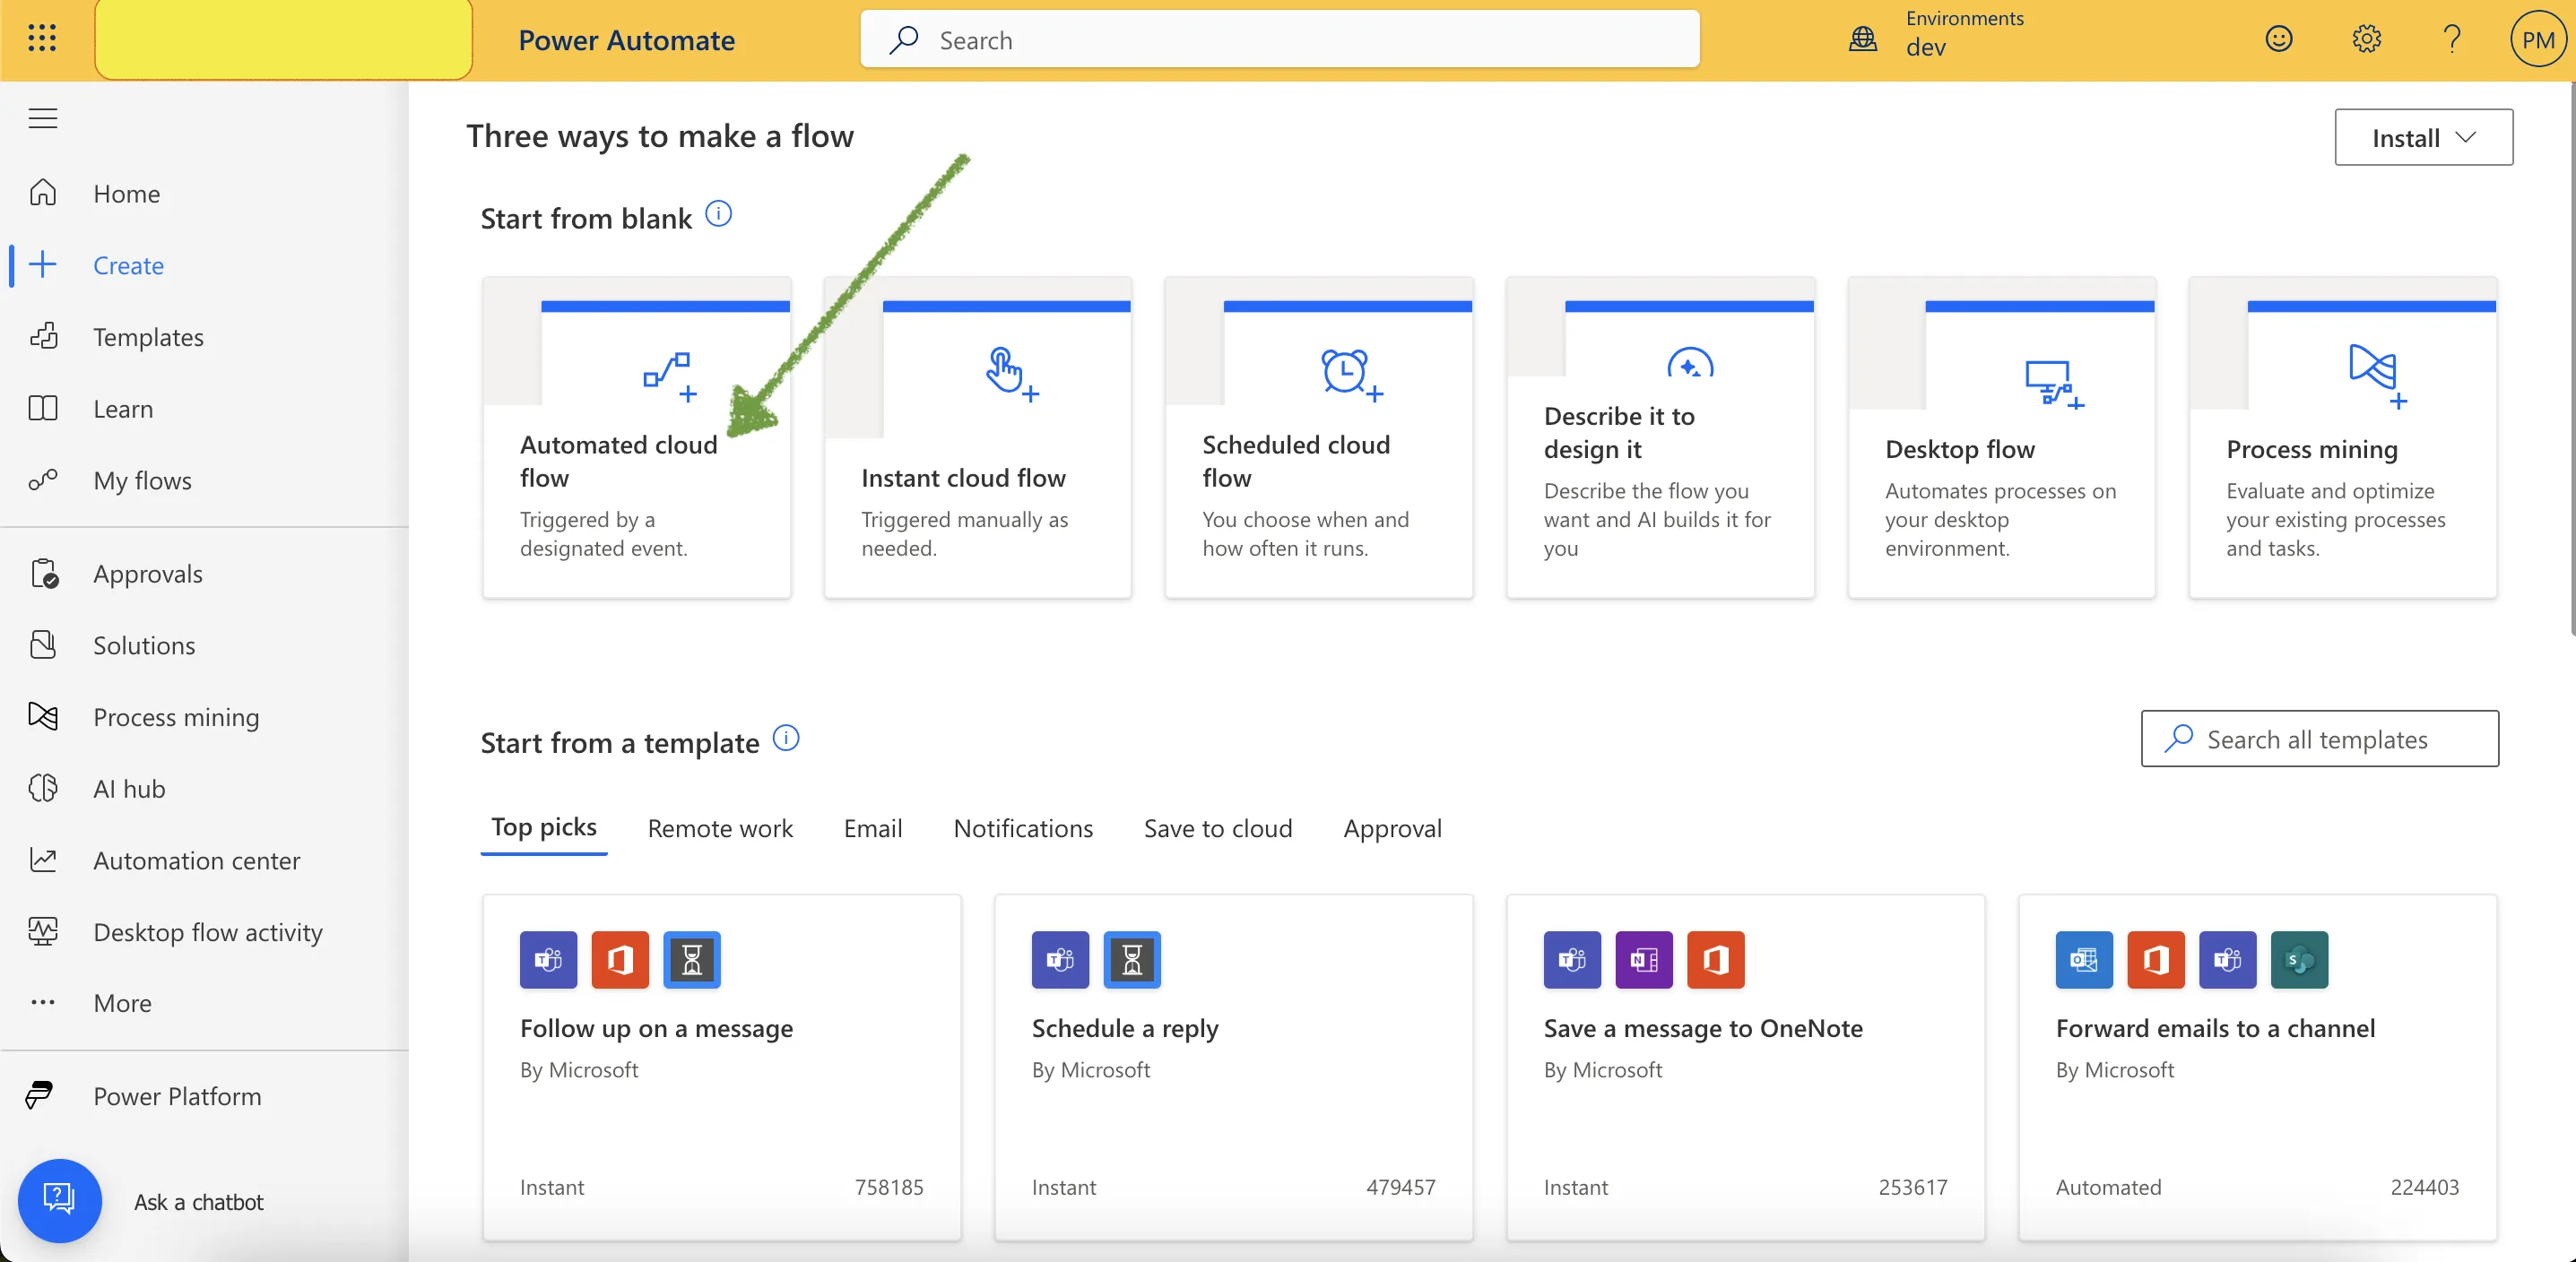
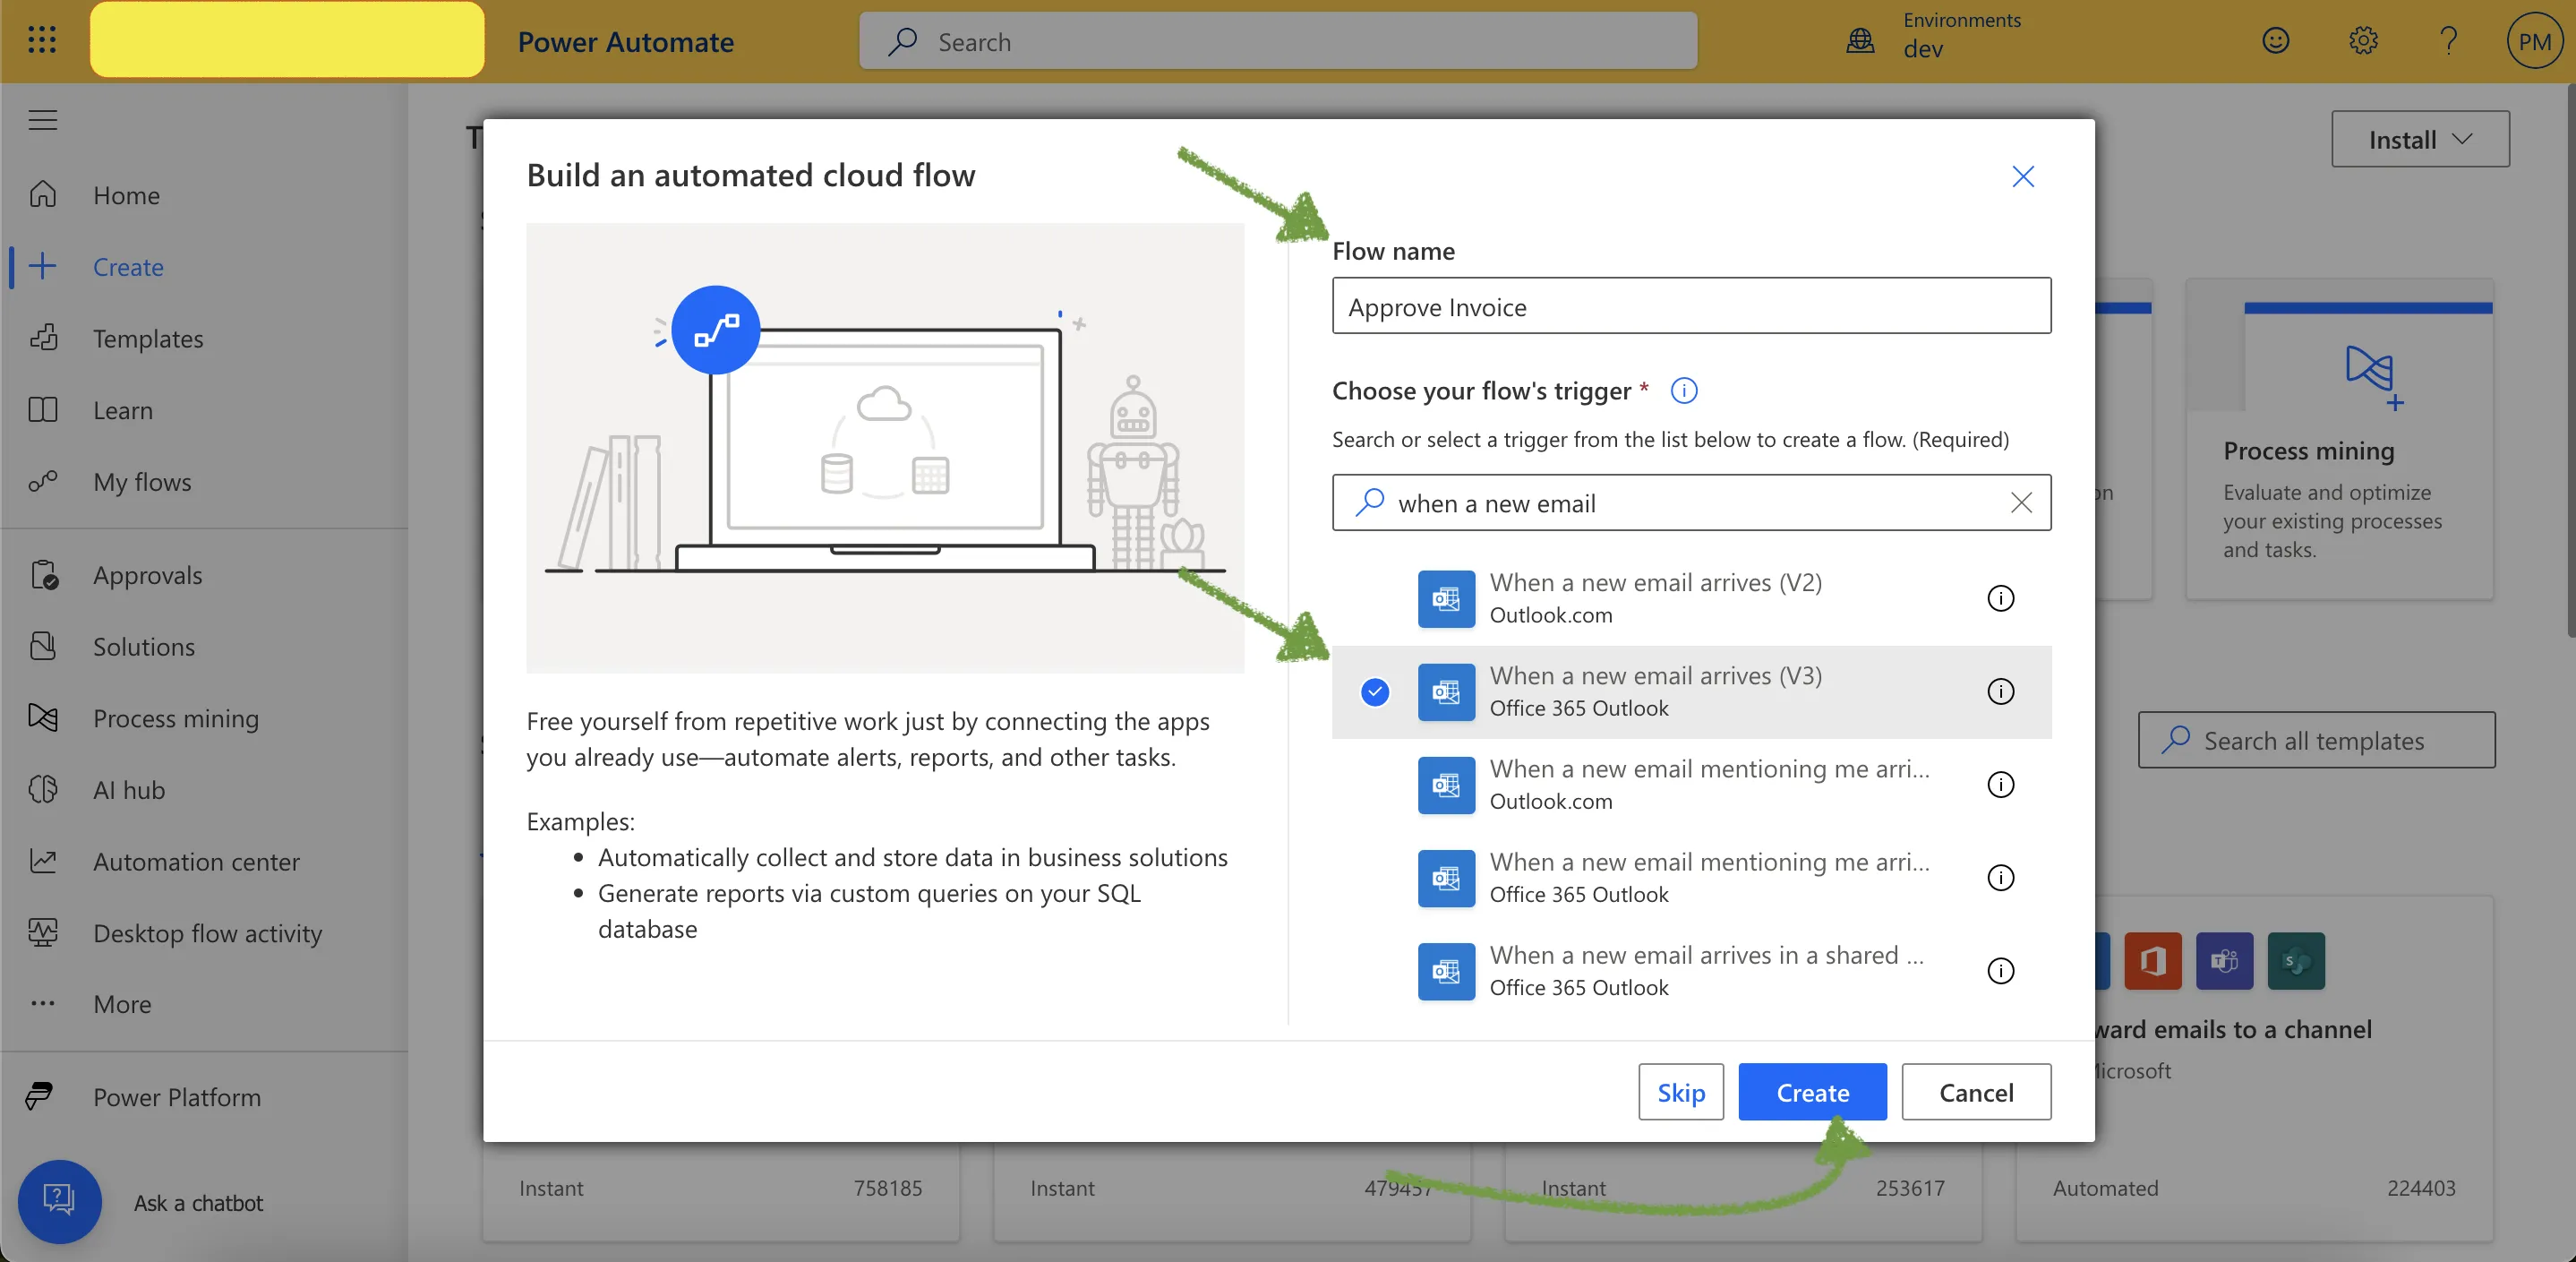
- Configure the Flow:
- Name: Enter a descriptive name, such as “Invoice Approval Flow”.
- Trigger: Search for and select When a new email arrives (V3).
2️⃣ Set Up the Email Trigger Conditions
-
Specify Email Parameters:
- Include Attachments: Set to Yes to ensure only emails with attachments trigger the flow.
- Subject Filter: Enter keywords like “New Invoice” to filter relevant emails.
3️⃣ Integrate AI Builder’s Invoice Processing Model
-
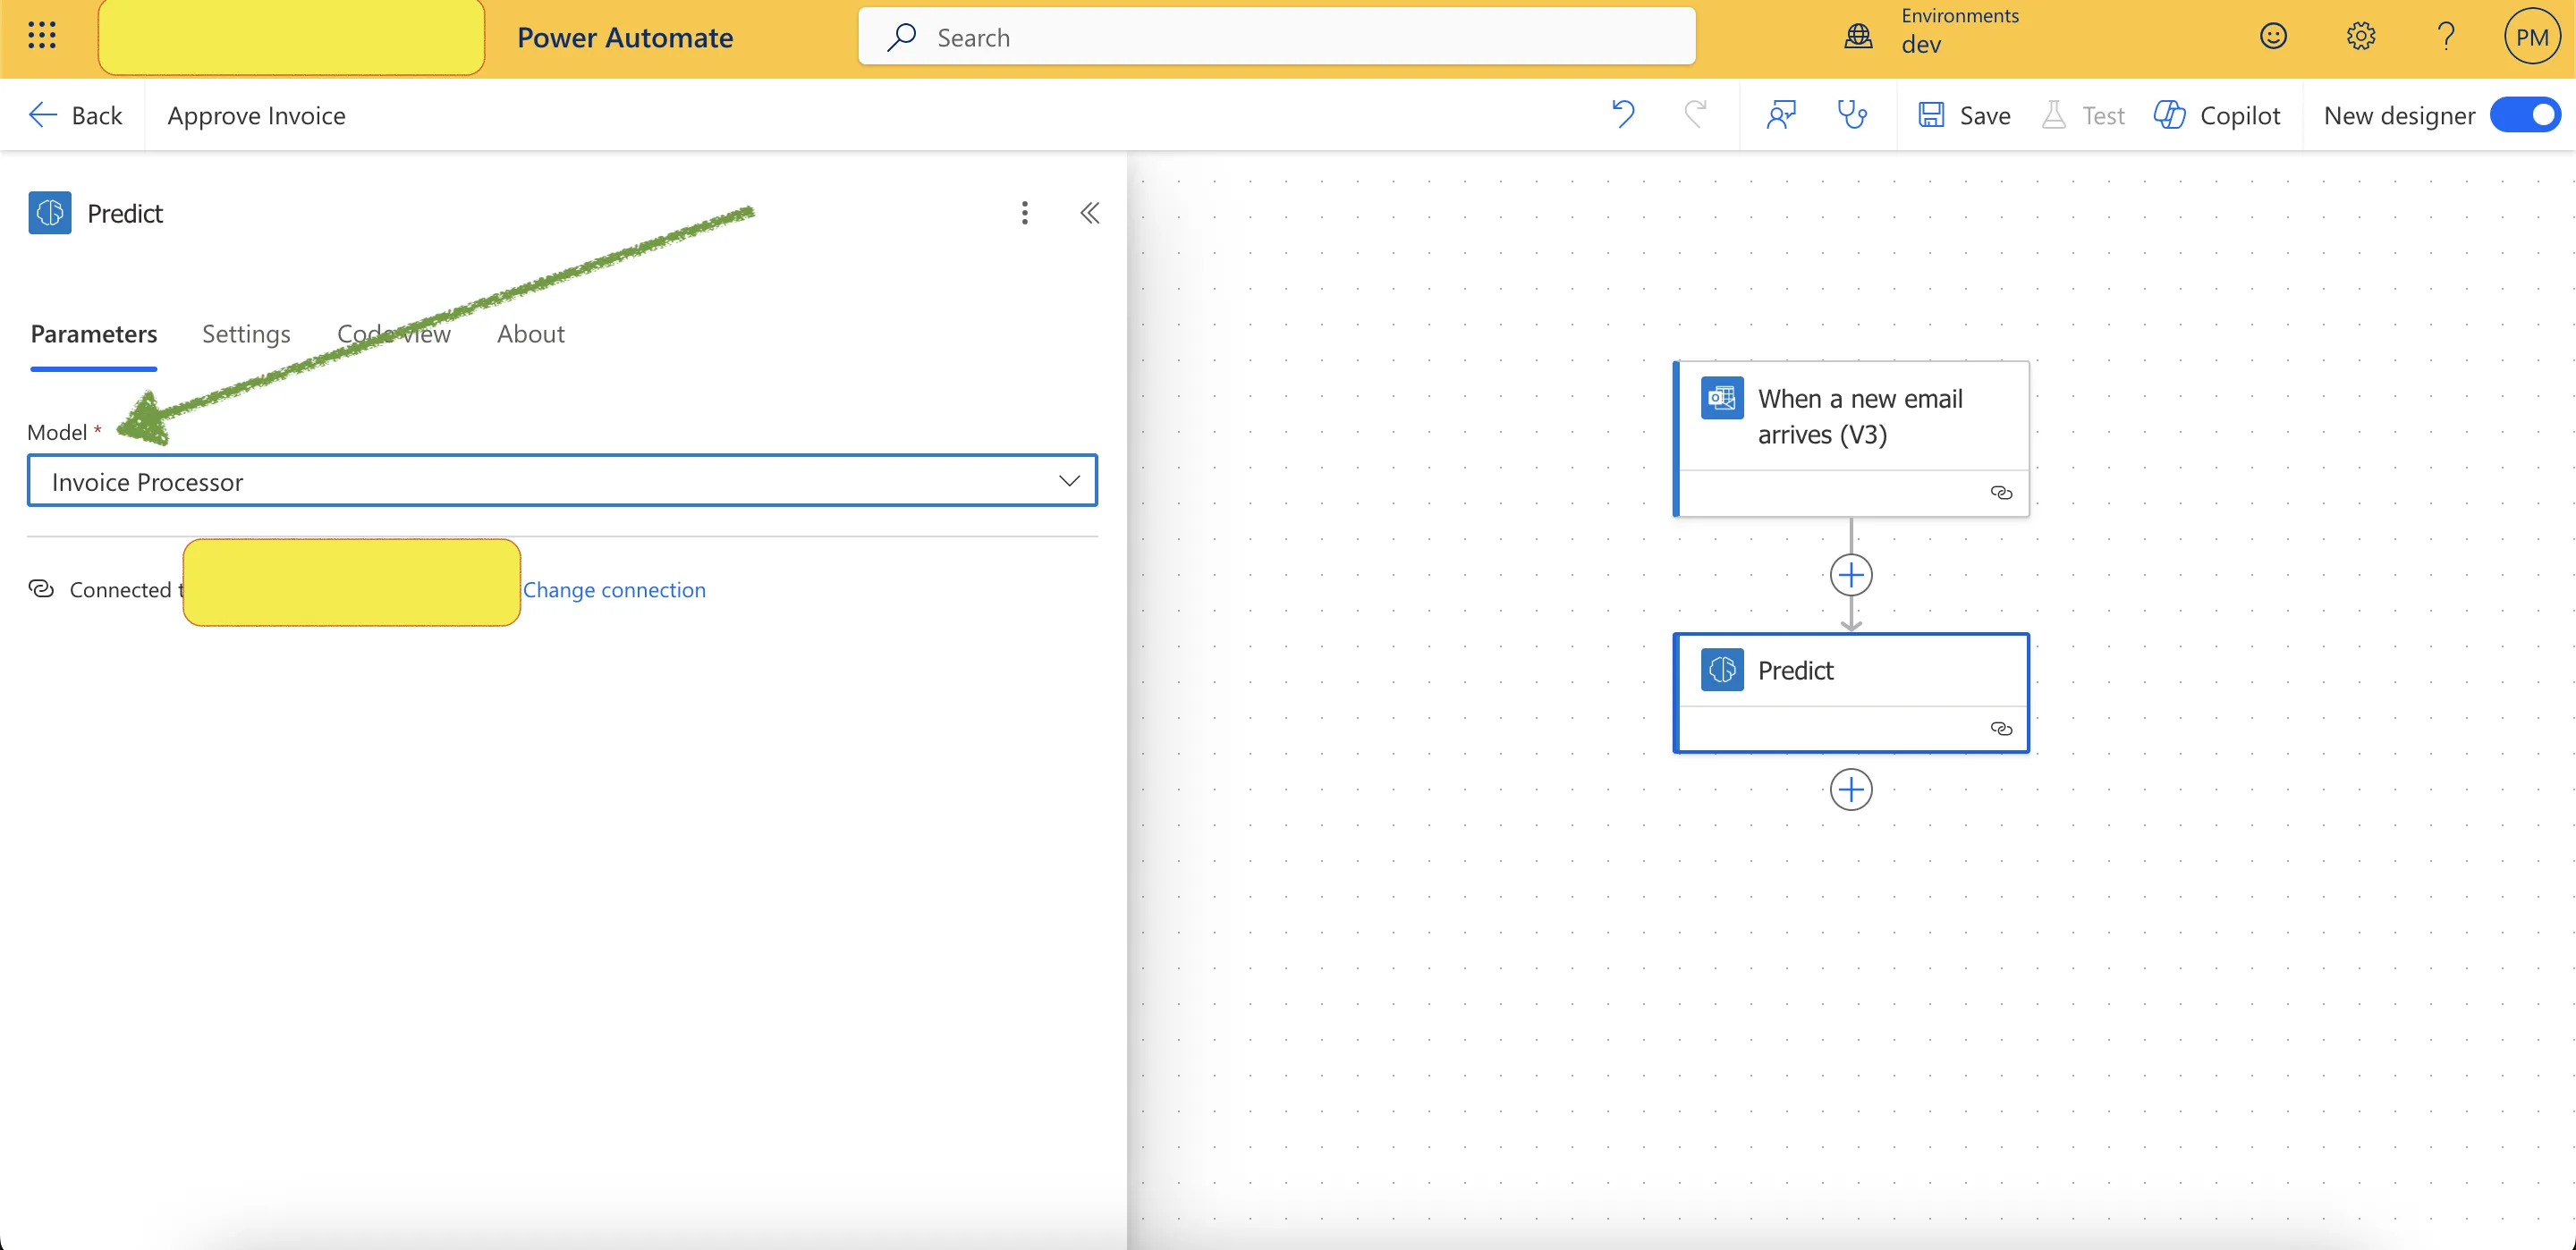
Add AI Builder Action:
- Click on + New Step.
- Search for AI Builder and select Predict.
-
Configure the Predict Action:
- Model: Choose your pre-trained Invoice Processor model.
- Document Type: Set to the attachment’s content type from the email.
- Document: Use the attachment’s content from the email.
4️⃣ Extract and Utilize Invoice Data
-
Retrieve Key Fields:
- From the AI Builder’s output, extract essential fields such as:
- Account: Vendor or client’s name.
- Invoice Number: Unique identifier of the invoice.
- Invoice Date: Date when the invoice was issued.
- Total Amount: Total payable amount.
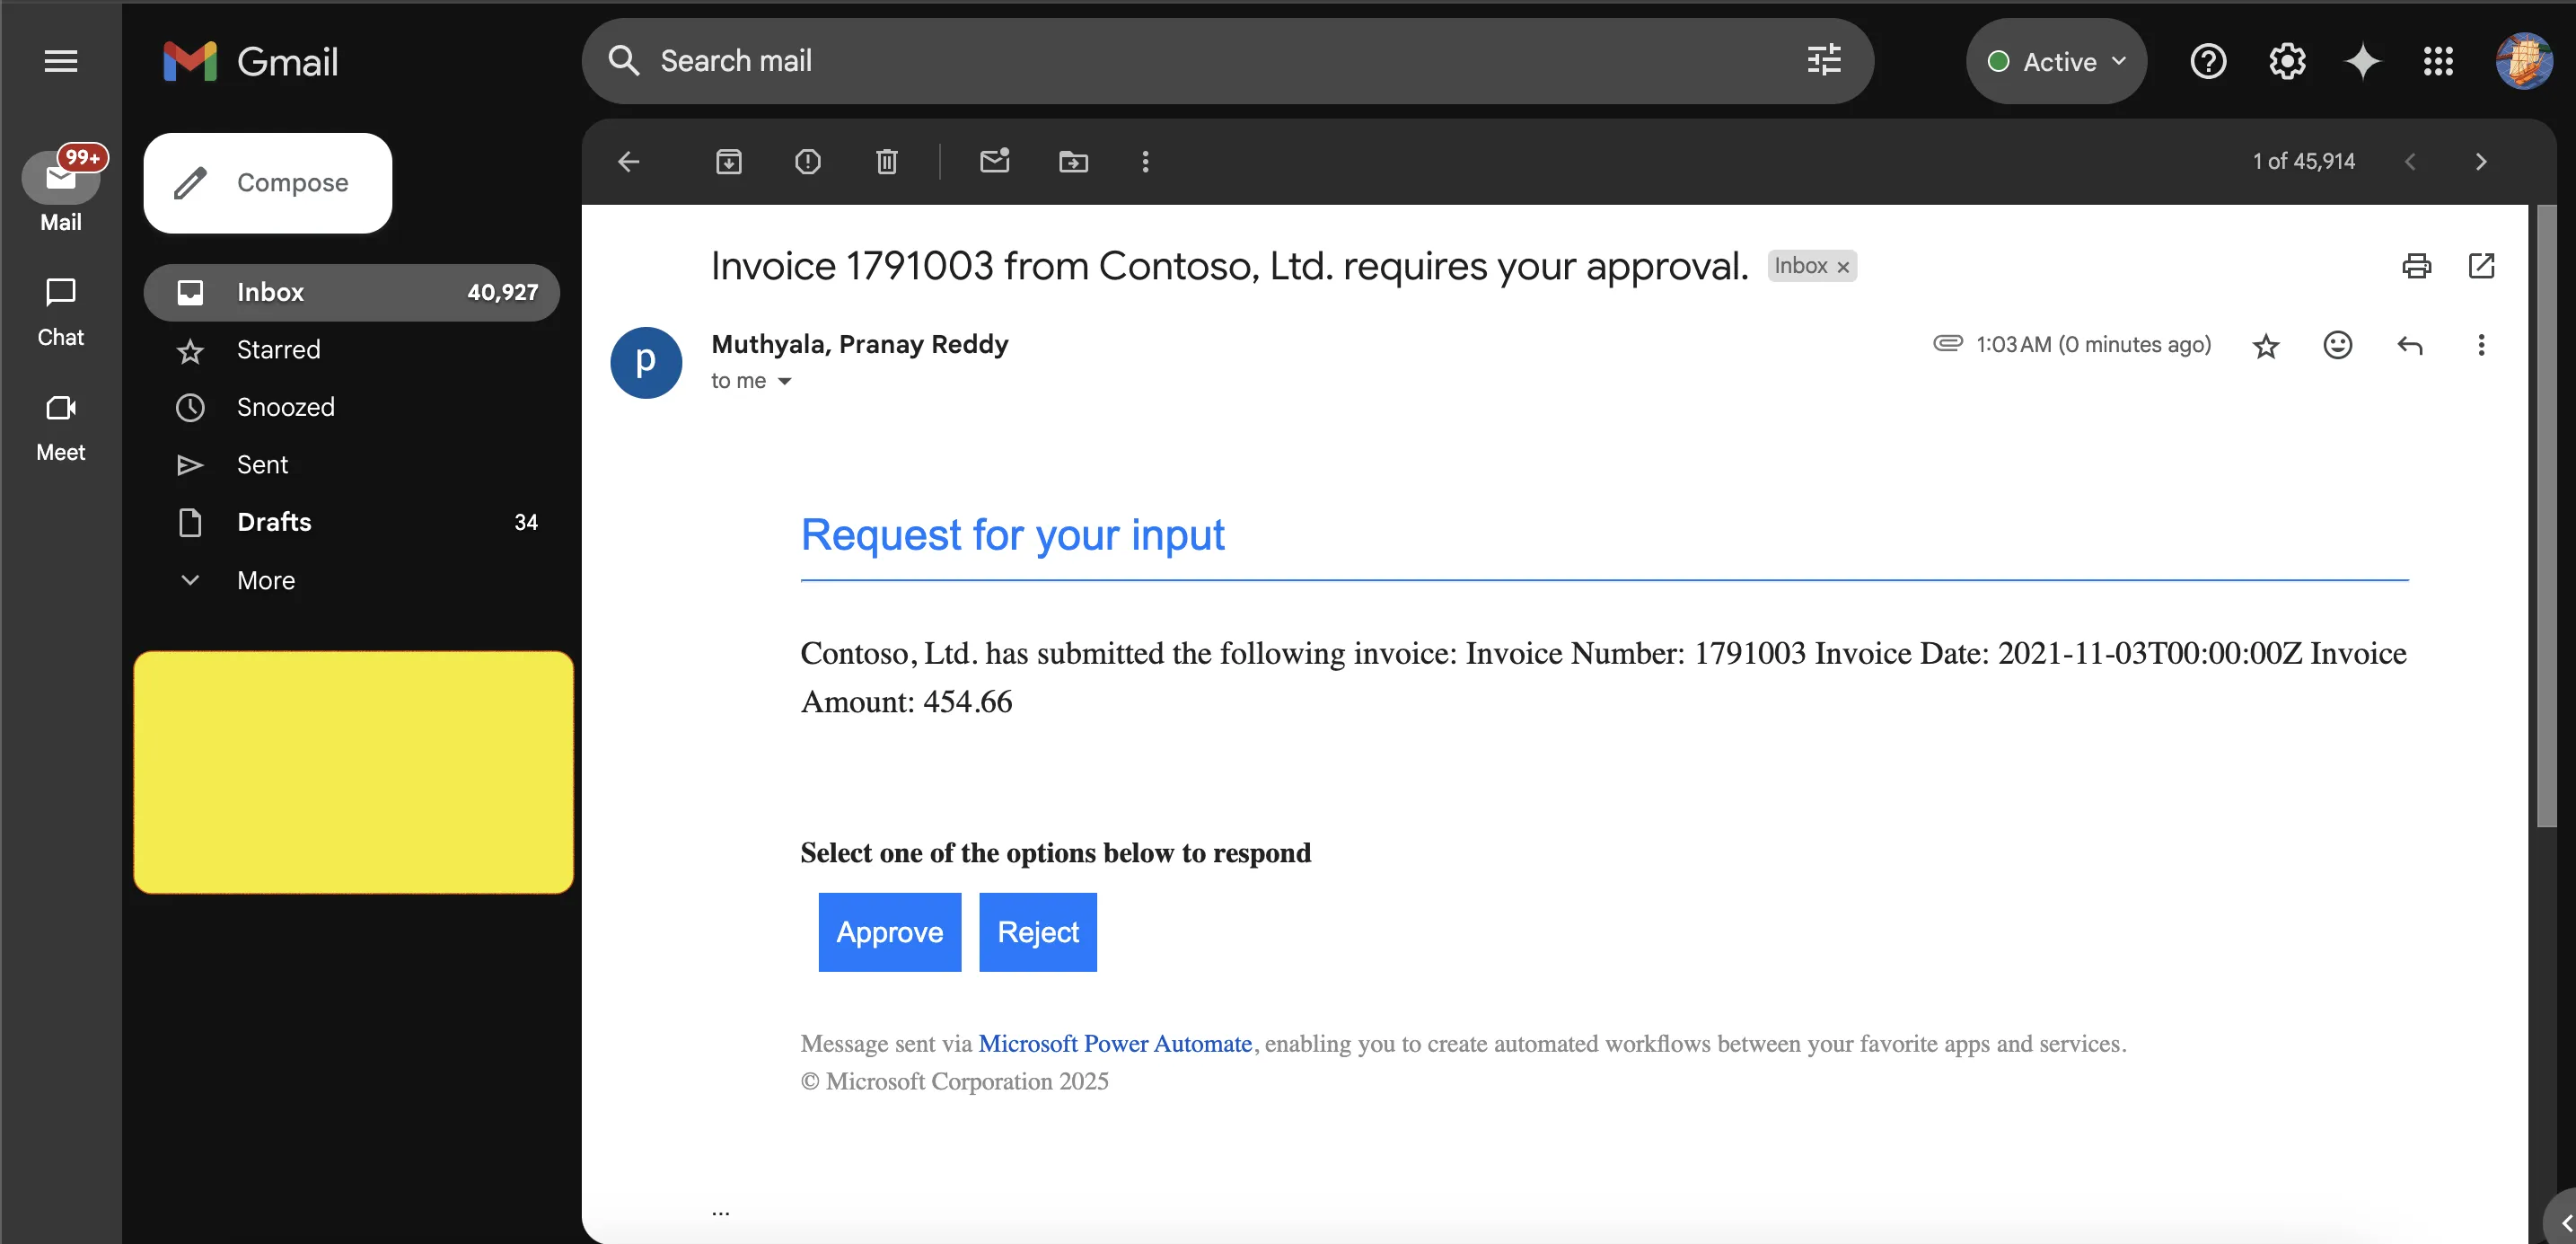
5️⃣ Send Approval Email
-
Add Approval Action:
- Click on + New Step.
- Search for Outlook and select Send email with options.
-
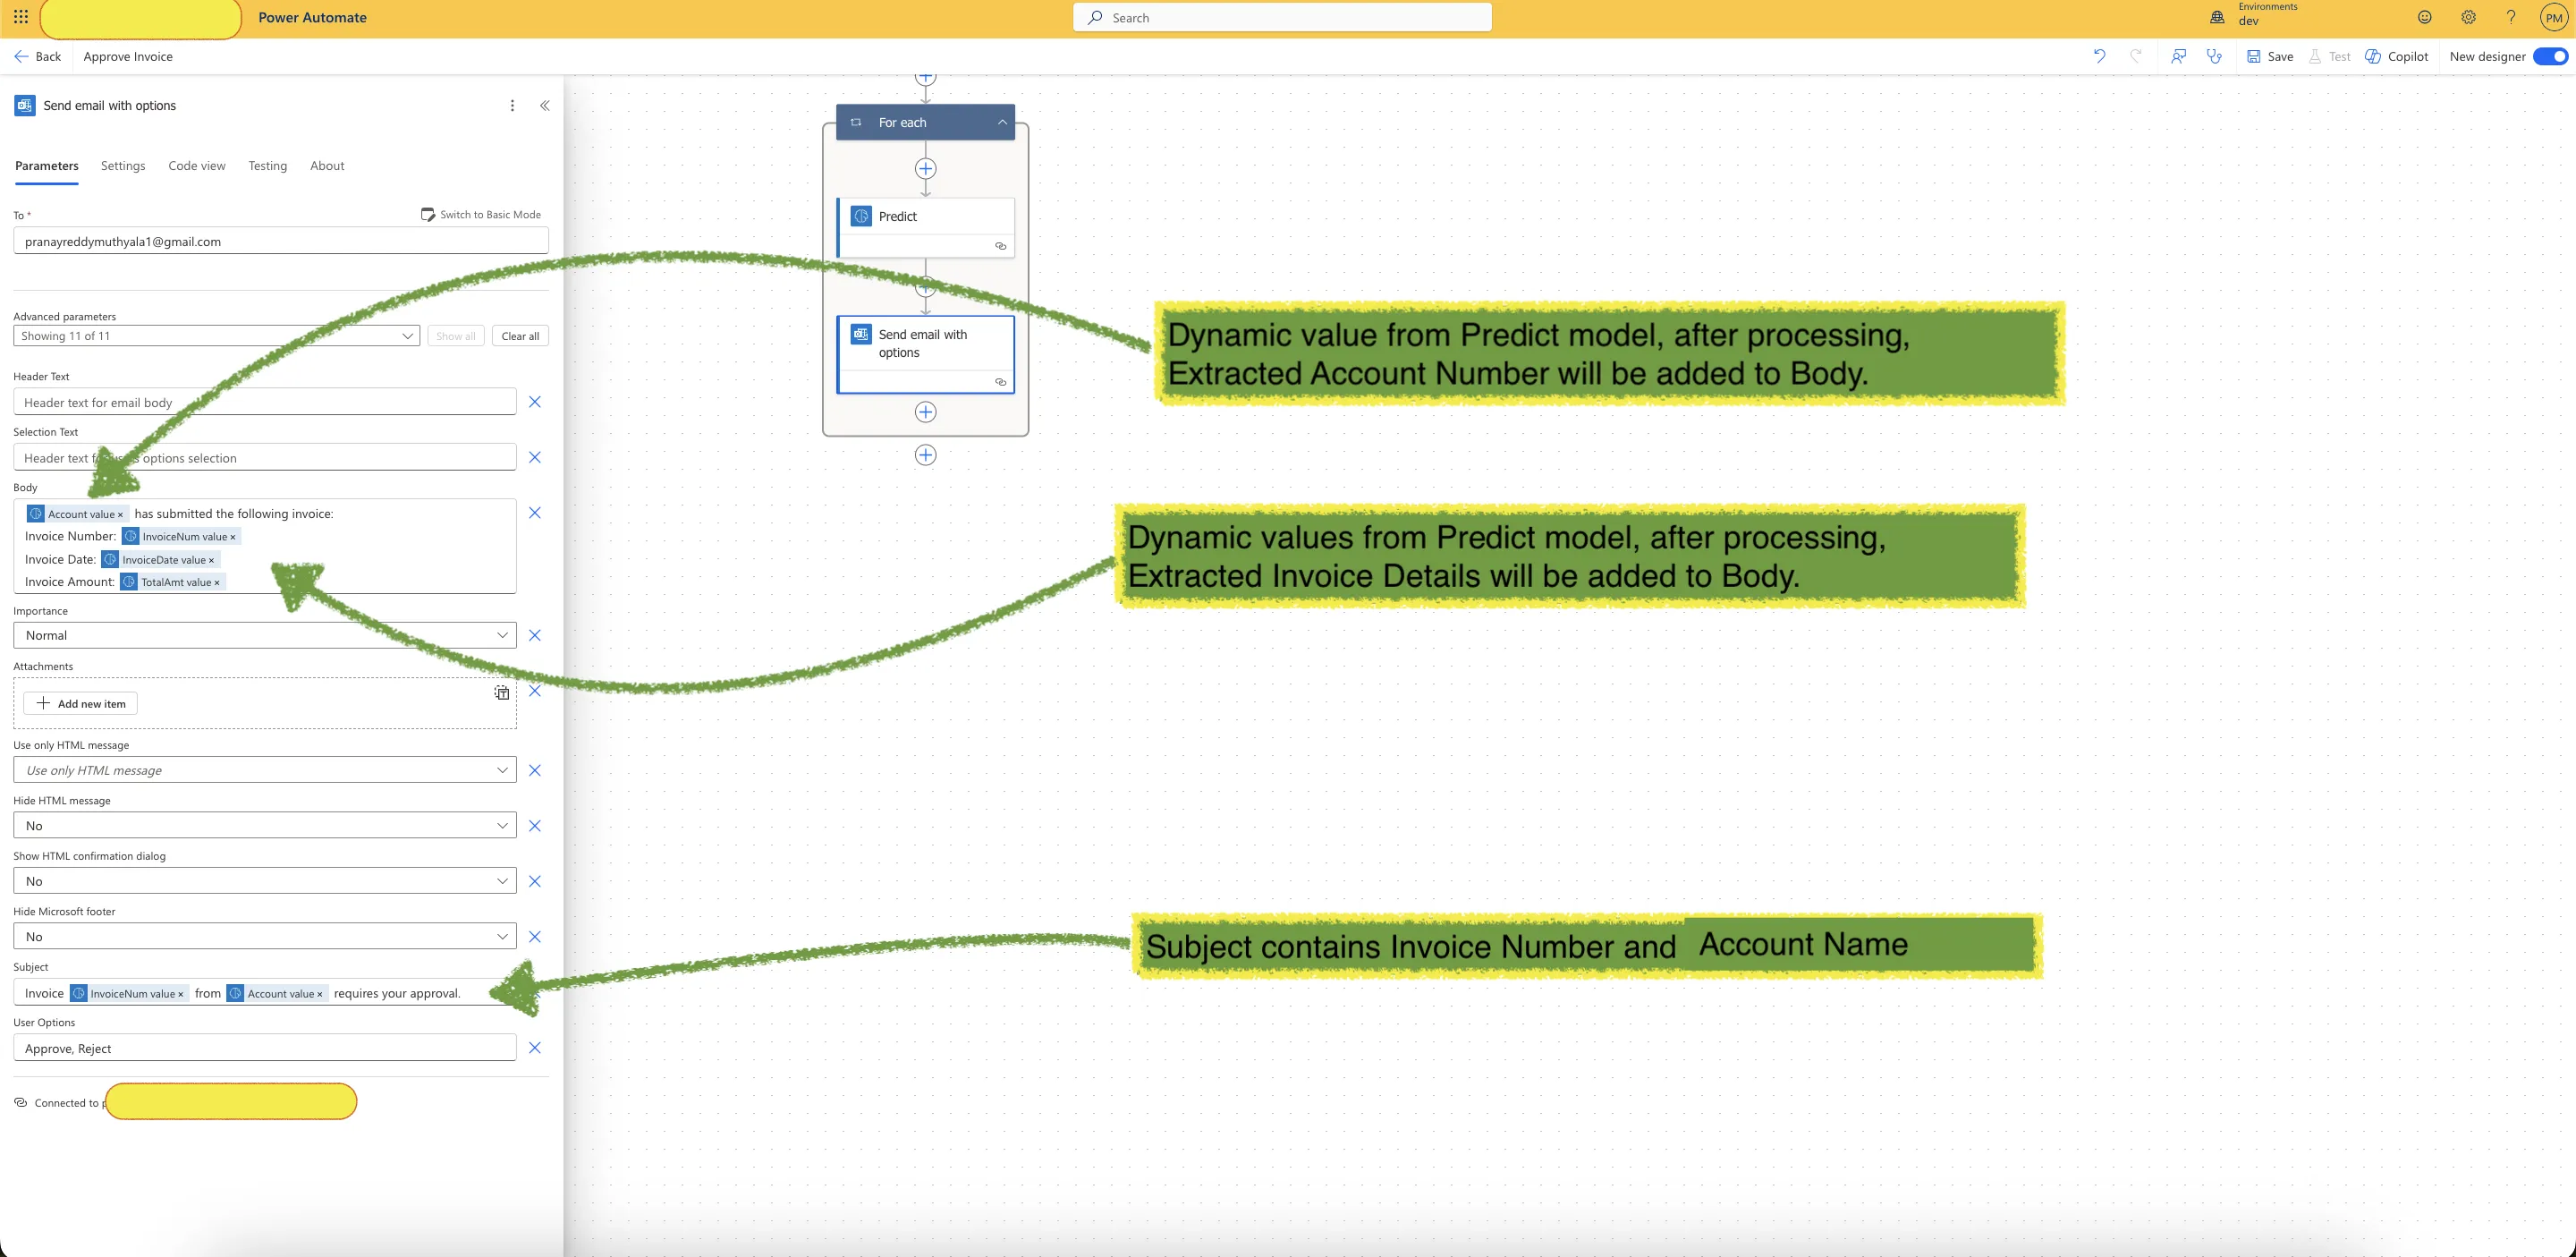
Configure the Approval Email:
- To: Enter the approver’s email address.
- Subject: Use dynamic content to personalize, e.g., “Invoice [Invoice Number] from [Account] requires your approval”.
- Body: Provide details extracted from the invoice:
- Vendor: [Account]
- Invoice Number: [Invoice Number]
- Invoice Date: [Invoice Date]
- Total Amount: [Total Amount]
- User Options: Set choices to Approve and Reject.

📊 Real-World Impact of AI-Based Invoice Processing
This AI-driven workflow significantly enhances efficiency, accuracy, and compliance:
💡 Before Automation:
- Manual invoice tracking using spreadsheets.
- Human errors in data entry leading to financial mismatches.
- Delays due to physical document approvals.
🚀 After AI Implementation:
✅ Faster invoice approvals (reduced from days to minutes).
✅ 100% automated invoice data extraction using AI Builder.
✅ Seamless email-based approvals, improving financial workflows.
🌟 Key Benefits
✔ 📑 Eliminates Paper-Based Processes – AI extracts key invoice details from scanned or digital copies.
✔ ⚡ Speeds Up Approvals – Automatic email routing ensures quick decision-making.
✔ 🔎 Improves Accuracy – AI reduces human errors in invoice verification.
✔ 🔗 Scalable Solution – Works with Dataverse, SharePoint, or external ERP systems.
🎯 Conclusion & Next Steps
By leveraging AI Builder and Power Automate, organizations can reduce invoice processing time, minimize errors, and improve financial workflows.
🚀 Stay tuned for more insights! 📜 View My Completion Certificate